Vintage RVs for the rest of us...
Ok, so next step in the roof ceiling repair…. I wanted to install the panel into the ceiling. I had been happy with the Epoxy resin I used to assemble the panel so I wanted to try using this same m…
Ok, so next step in the roof ceiling repair…. I wanted to install the panel into the ceiling. I had been happy with the Epoxy resin I used to assemble the panel so I wanted to try using this same method to attach the panel onto the aluminum skin.
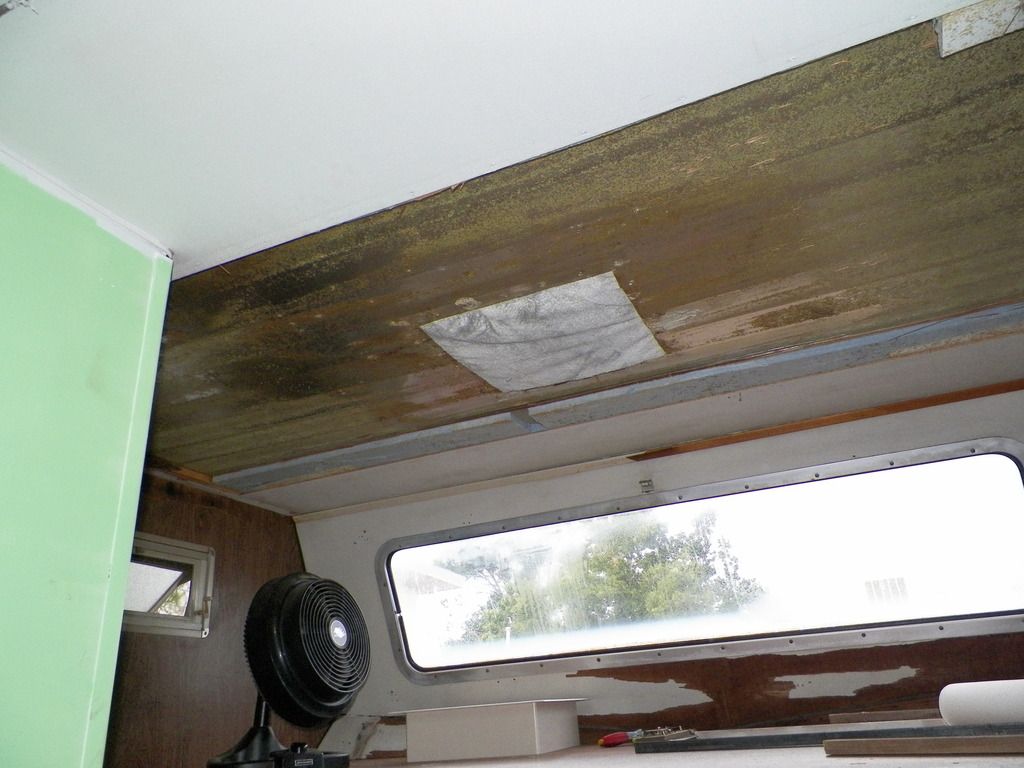
First I cleaned up the underside of the aluminum roof:
Pre:

Post:
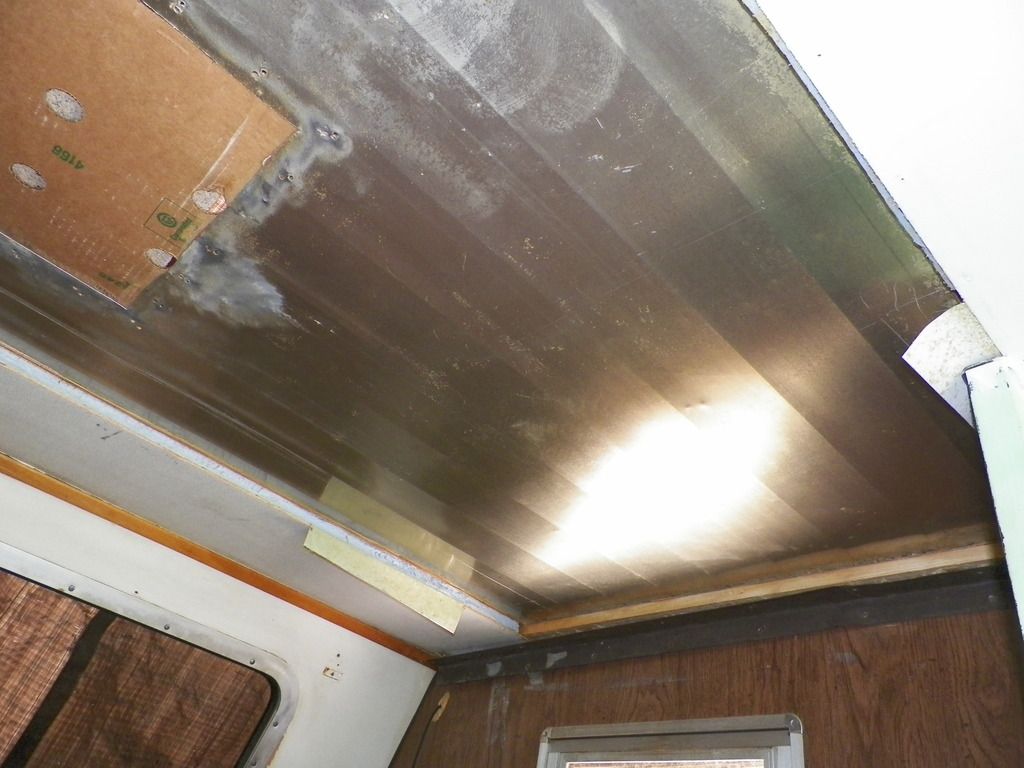
I used a wire brush on a drill to scrape most of the old glue off, then mineral spirits to clean up the metal.
Ok, roof ready…
Panel ready…
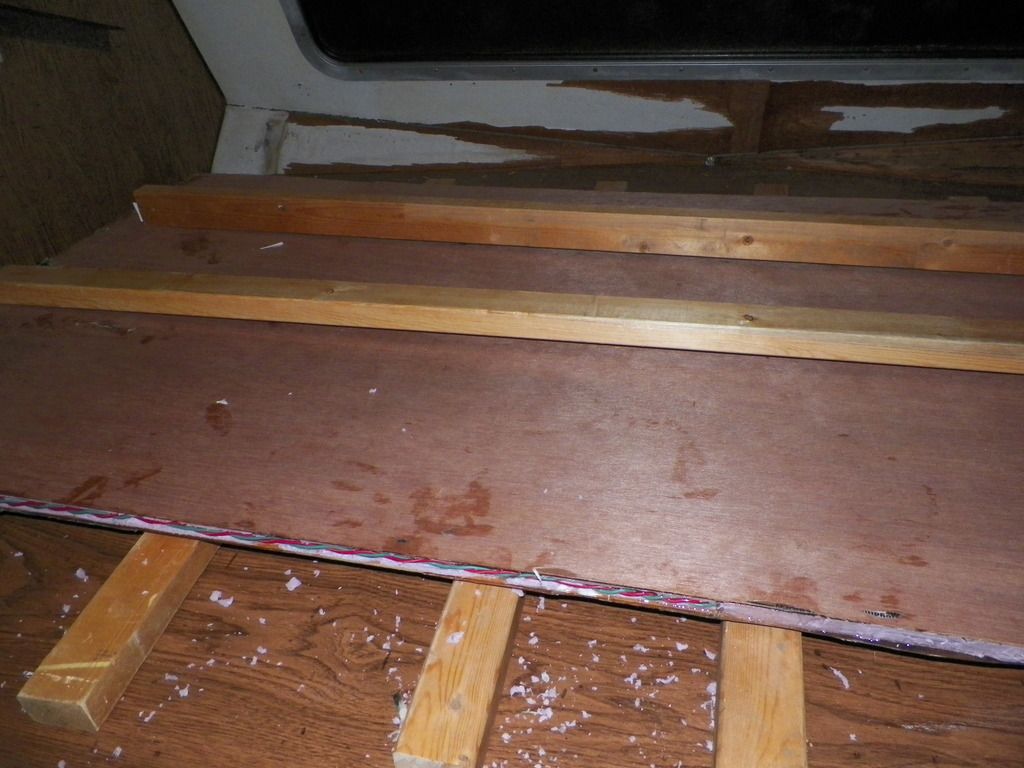
Now to figure out how to raise it into position…
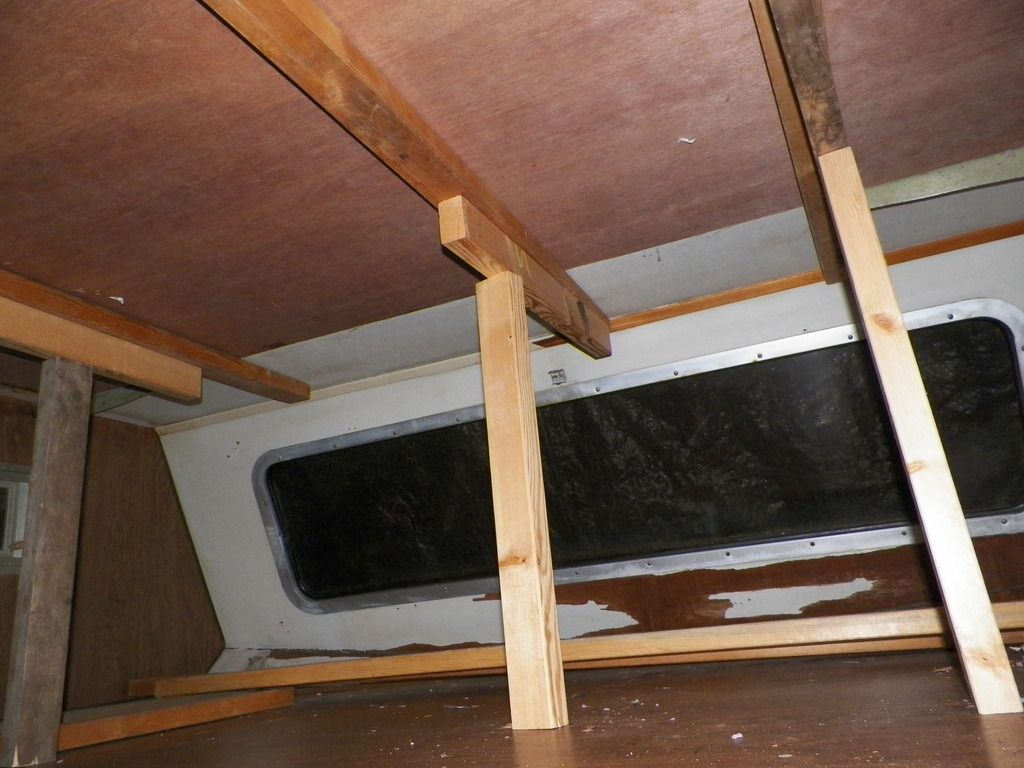
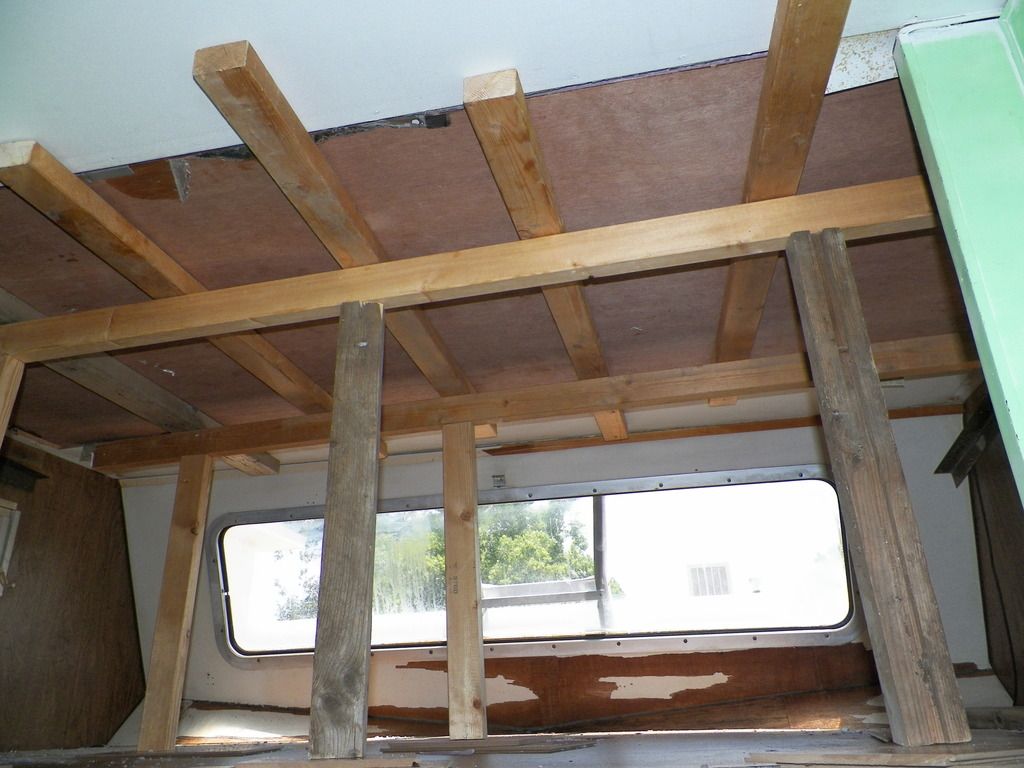
Well, after much deliberation, I finally just tried the simple approach and used scrap 2x4’s cut to the right length. I then used old flooring scraps as shims to get raise the supports to get the right pressure from the bottom.
This was a lot easier with the help of a few extra hands… again my son and daughter helped with this assembly. It was somewhat stressful since I was worried about the resin setting before I got everything placed…it was probably 95 degrees outside which would shorten the cure time…
Anyway, here is the panel lifted into place from the inside:
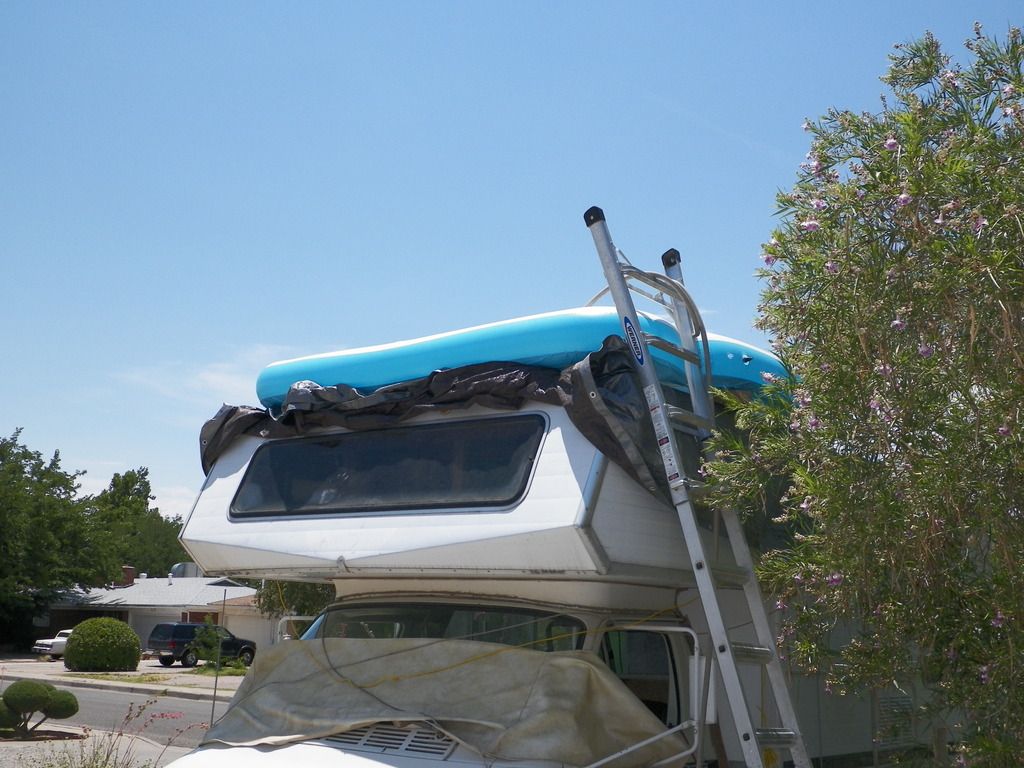
Since I had no way to place large clamps on the outside, I decided on a similar method to when I built the panels… Pool Power!
I had the same wading pool from before up on the roof and after lifting the panel from the inside, I in filled up the pool to press the roof aluminum down onto the panel…
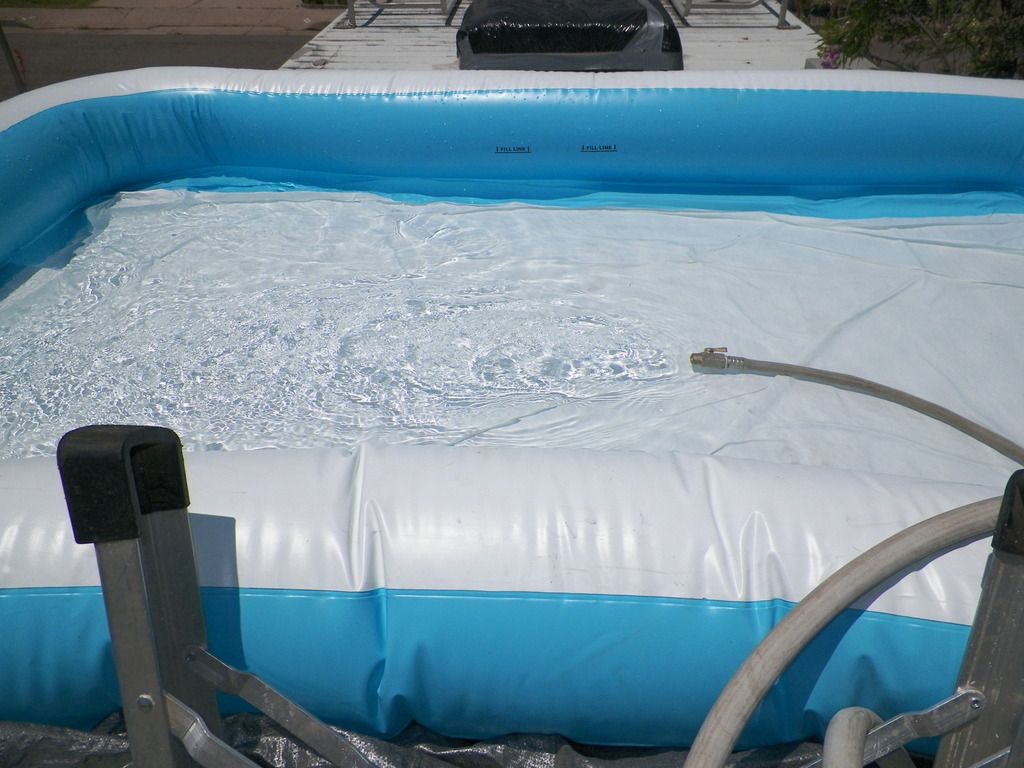
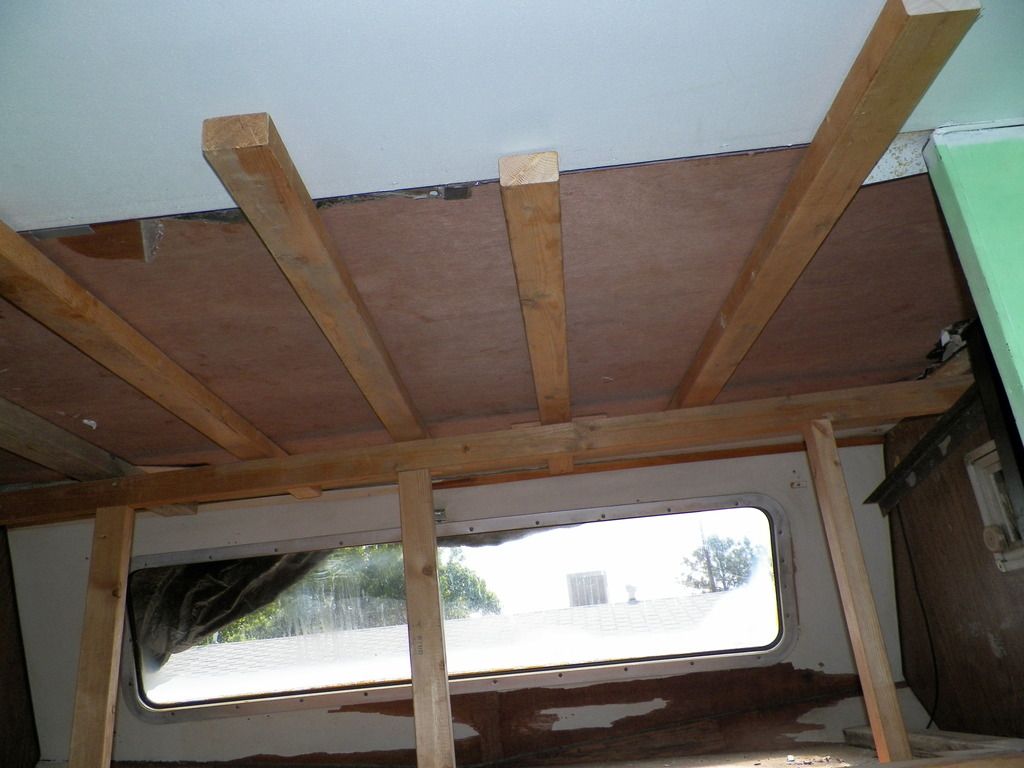
I then went back inside and adjusted the shims to press the roof up into place in a few key areas..
So, now I just had to monitor the pool fill level and top off the air as needed.
I did had a slight problem when the water weight pushed out one side of the pool after a few hours of slow deflation and started to let water out of the pool. (my son lost the air stopper when he was laying out the pool for inflation so I had to make a stopped out of an old lifter and some electrical tape… )
After inflating the pool a second time (this time with more air!) I was able to refill the partially lost water and did not have any more problems.
After leaving everything in place into the night (about 9hrs total). I simply drained the pool using siphon action back into the yard with the fill hose.
Other than some minor stressful moments getting things in place to cure, it went pretty smoothly.
I will have some evaluation after I spend some more time up on the roof installing the new Vent Fans.
Views: 132
Tags: rv roof repair
Comment
-
Comment by Rich Thomas on July 22, 2015 at 7:48pm
-
Hi Brett.I spent some time trying to decide if I should ask a dumb question and in the end, I thought it better to ask and maybe spark an idea than not to and maybe let someone find a problem that could have been avoided.
-
Comment by Brett Webb on July 22, 2015 at 4:39pm
-
Thank you Pat!
I am happy with the results so far, lots more problem solving ahead since I plan to update almost every system in the Winnie!
Rich, I understand your question and I share the concern, less in terms of metal fatigue, but in terms of overall sturdiness. You have not seen it yet, because it is not finished...but there will be support on both sides of the ceiling from brackets to the walls.
I am also looking at how to add some support from the top, trying to connect the adjacent panels to the one in installed. I am still working on the easiest/most cost effective/least intrusive solution.
This usually means I dig around in my scrap piles I have squirreled away and try to rig something up ! :)
Anyway, more updates coming!
-
-
Pretty interesting project Brett, are you planning any additional support like putting a bead board along the sides walls and front face of the ceiling. I would think just letting it hang off the aluminum roofing will eventually cause metal fatigue and roof failure over time. Sorry for being an alarmist but I've followed your progress and you've done a nice job but the aluminum roof isn't structural and I'm afraid it will lead to stress failures and leaks if you don't support the whole of it.
HOW TO MEMBER POSTS
JOIN US AT GOOD OLD RVS
If you love classic and vintage RVs then come Join us. Come on in and have some fun. JOIN HERE NOW
Forum
Help
Started by Brianna Scroggins in RV Repair & Maintence yesterday.
1973 Scamper Class C electrical question 1 Reply
Started by Ken Vanderburg in RV Repair & Maintence. Last reply by Jimco_W001 Mar 29.
Starcraft Ceiling Repair
Started by Donald Morgenroth in RV Repair & Maintence Mar 18.
Blog Posts
1973 Dodge Hall GTC
Posted by Alfonso Vilches on July 7, 2023 at 8:18pm
Parts for a 1978 Allegro Motorhome
Posted by Ellen (Ellie) Rice on December 9, 2022 at 6:24pm — 1 Comment
Wanted side lights
Posted by David & Misty Preciado on June 10, 2022 at 6:18pm — 2 Comments
1991 Beaver Contessa
Posted by John Curtis on March 5, 2022 at 11:00am
Events
Videos
-
Men Don't Cry, They Act
Added by Jimco_W001
-
-
Tin Can Tourist Rally 2021
Added by Daniel Long
JOIN US - COME ON IN!
Members Restoration ALBUMS & Stuff We Like
-CLASS C FULL Frame off Restoration by Kevin Crowley
-Kerry Malseed's 1947 Flxible Clipper Bus Restoration
-Kevin's Wildcat Trailer Frame Up Restoration & Materials Used
-Rod Paints His Trailer Before/After Pics
-Understanding Brake Controllers
Blogs, Posts and Other things We like to Follow....
Vintage Travel Trailers, Vintage Campers, Camper Restoration, Bus Conversions, Vintage RV Forums, Old RVs, Tiny Homes, Boondocking
A work of art by member Paige Bridges
+++++++++++++++++++++++++++++
Disclaimer - Please Read it
Enjoy this site and use it totally at your own risk.
By using or viewing this site YOU agree to Hold Harmless anyone associated with it including other members. Also, YOU agree that YOU are solely responsible for ANY and ALL actions, results or damages. Members "opinions" are just that and any repair or alteration comments or recommendations are by folks who are not licensed repair or mechanical professionals. Any repairs or modifications you do totally at YOUR OWN RISK. Use licensed professionals for all work to avoid possible serious injury or damage. Use banks for purchases. Have fun!
Copywrite & Trade Mark Registered GoodOldRV© ,GoodOldRVs©, GoodOldRVs.com©,GoodOldRVs.net©,GoodOldRV.Com©
© 2024 Created by Jimco_W001.
Powered by
![]()
You need to be a member of Good Old RVs to add comments!
Join Good Old RVs