Vintage RVs for the rest of us...
Restoring our Coachmen
This all started back in July 2012.
My folks started talking about sending their old motorhome off to the crusher seeing as it hadn't been used in years.
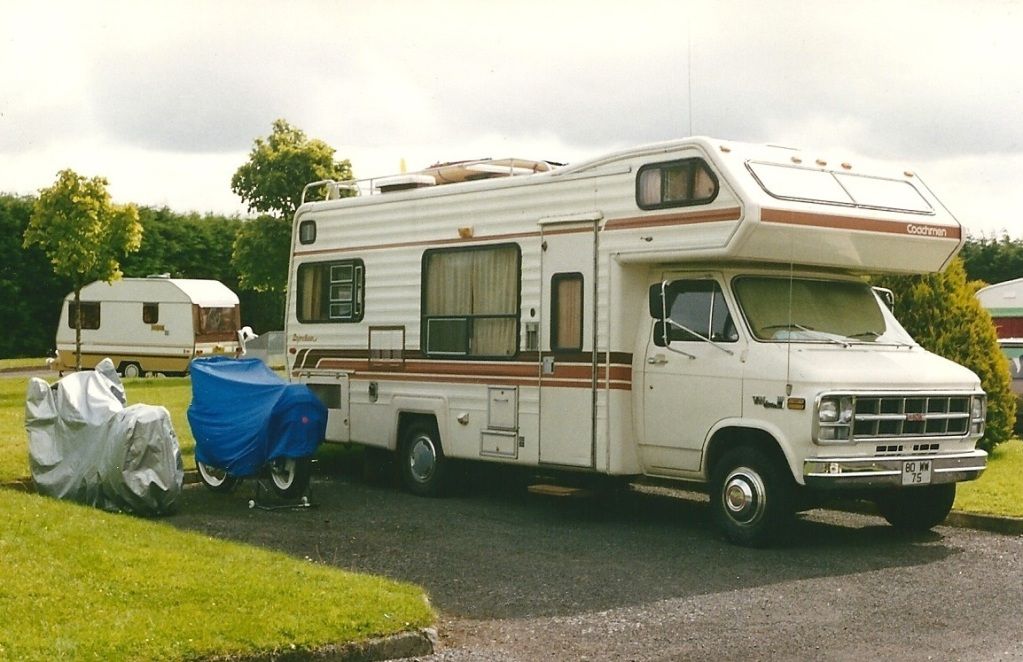
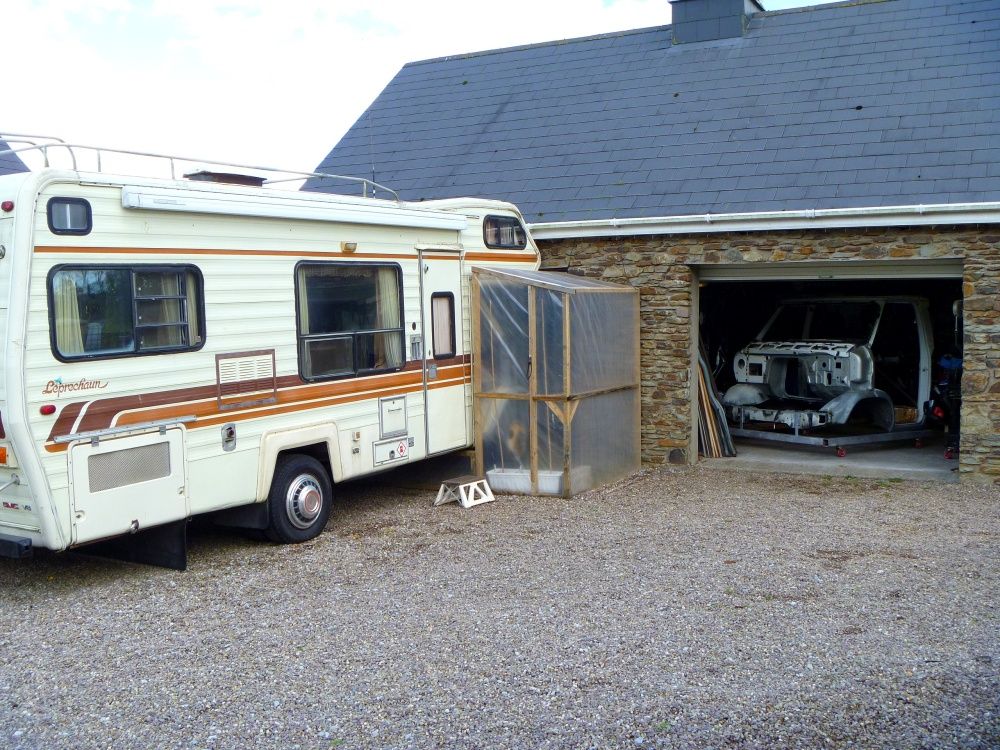
They bought this used rig just before my dad retired and they enjoyed it for 20+ years touring around Ireland and Western Europe. Unfortunately, the damp Irish weather wasn't kind to it and the rust demons finally caught up and did their thing. It seemed like every year, my dad was repairing rust on the cab. But in 2006, he noticed the firewall had rusted through quite badly and he became concerned with the safety of the rig, so it was moved to the bottom of the garden and was parked for good. From then on, it's primary function was for storage and it filled up pretty quick with all sortsa stuff.. So when they started talking about clearing it out and getting rid of it, I got a lump in my throat. I mean this camper has been in the family forever. We had such a great time in it, I can't even begin to think about it being broken up and scrapped. No sir.
When I expressed an interest in taking it away and fixing it up, my folks were delighted and told us that we could have it if that's what we wanted to do. They've moved onto other things now that they are in their later years and they've lost interest in the camping lifestyle. We, on the other hand, are very active campers. We get away as often as we can in our Outwell hartford family tent. So upgrading to an RV will be fantastic, especially considering the family history of our old coachmen. Consider it a new chapter in the life of the old girl! The only downside is that there is a LOT of sweat equity due on this camper before we put a tyre on the road!
My plan... Simply to repair the cab 100%, refurb the accommodation unit, and enjoy the camper with my own family and maybe feed some of my own nostalgia along the way... No other camper will do. I'm sure some of you know that story....
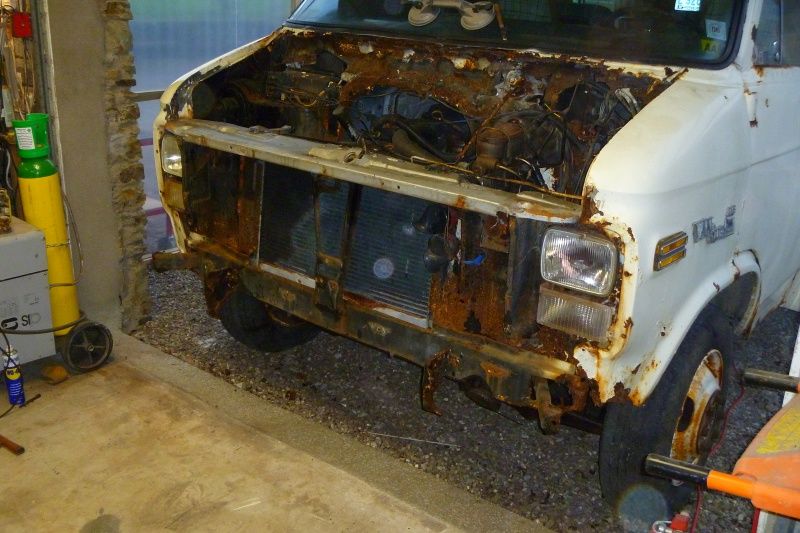
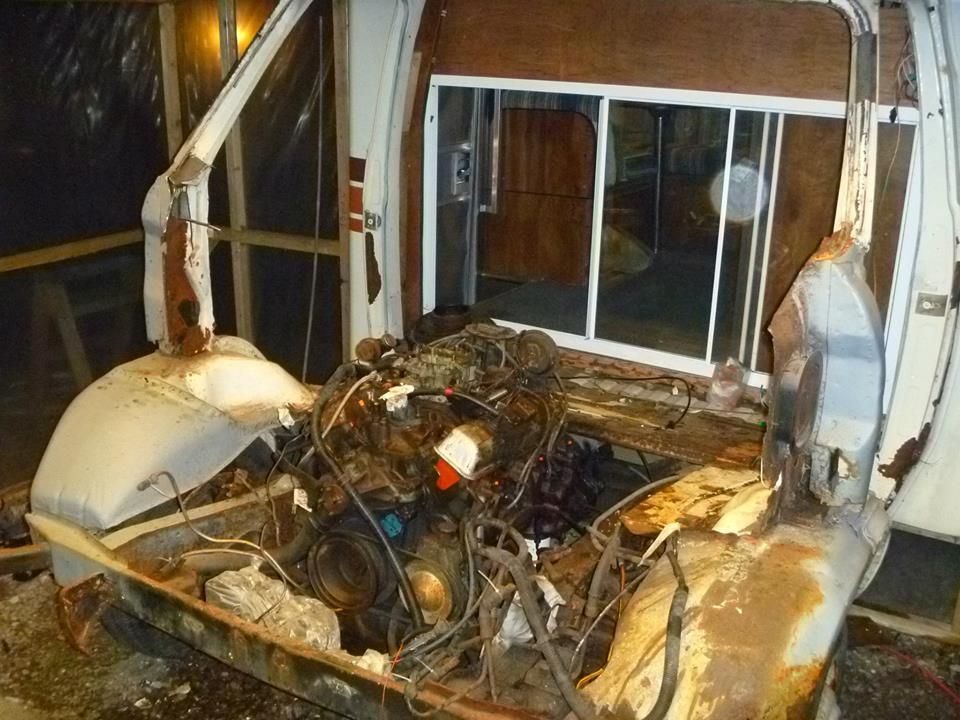
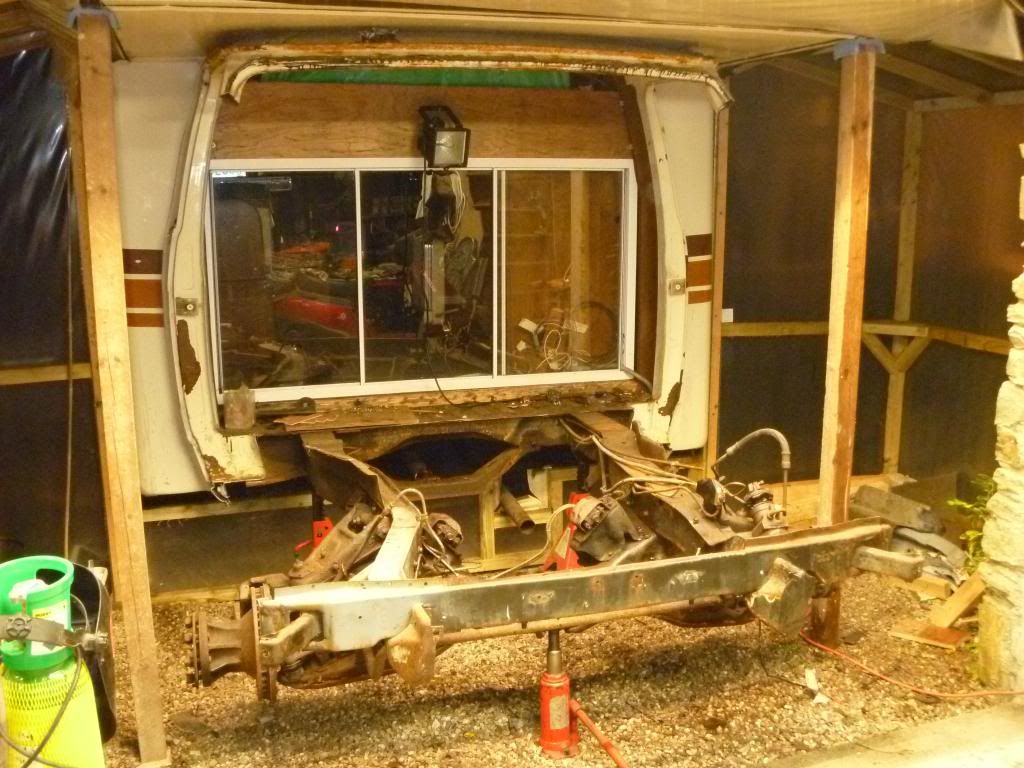
It wasn't in great shape. Here is what we saw when we pulled the tattered covers down off it.
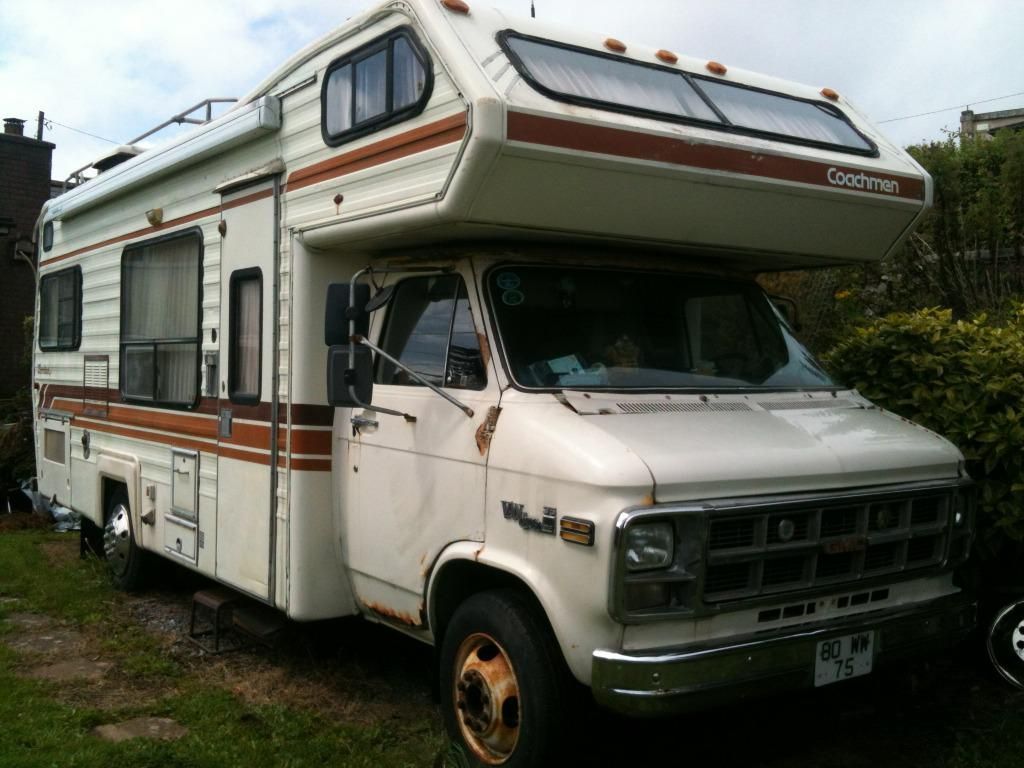
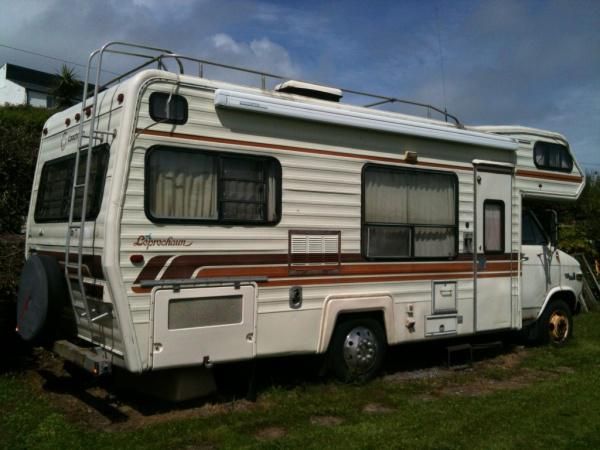
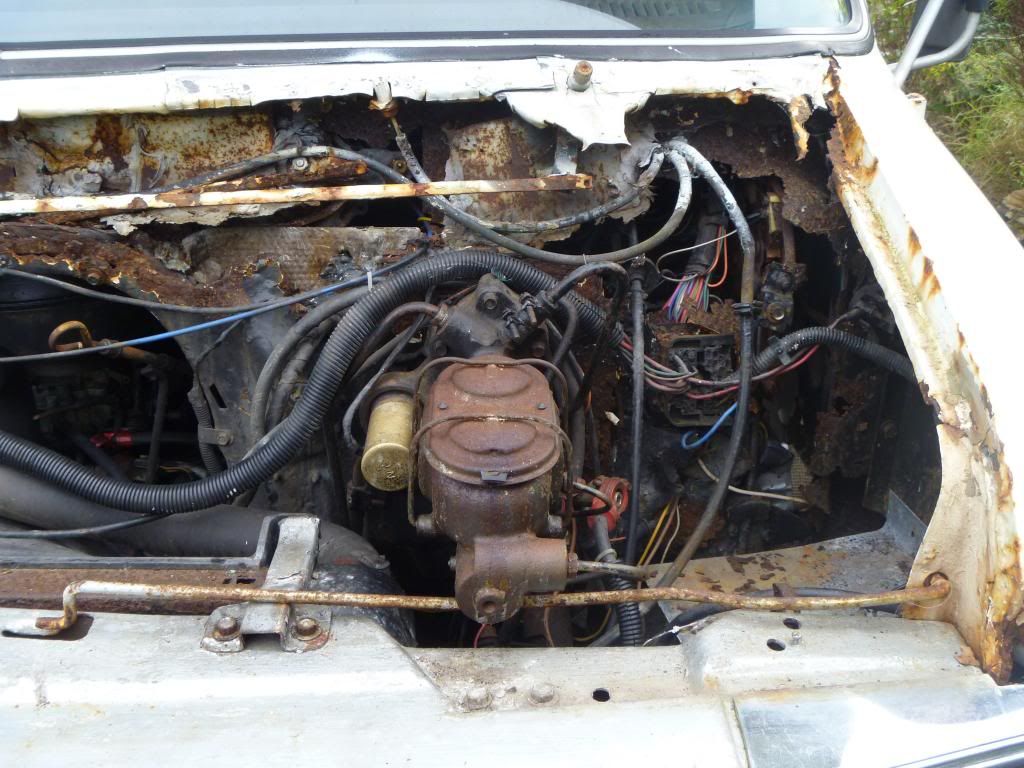
It didn't look too bad on first inspection, but after pulling back some carpet & panels, and some probing with a pointy screwdriver, we uncovered LOTS of problems... Firewall, floors, doors, etc. all rotten.
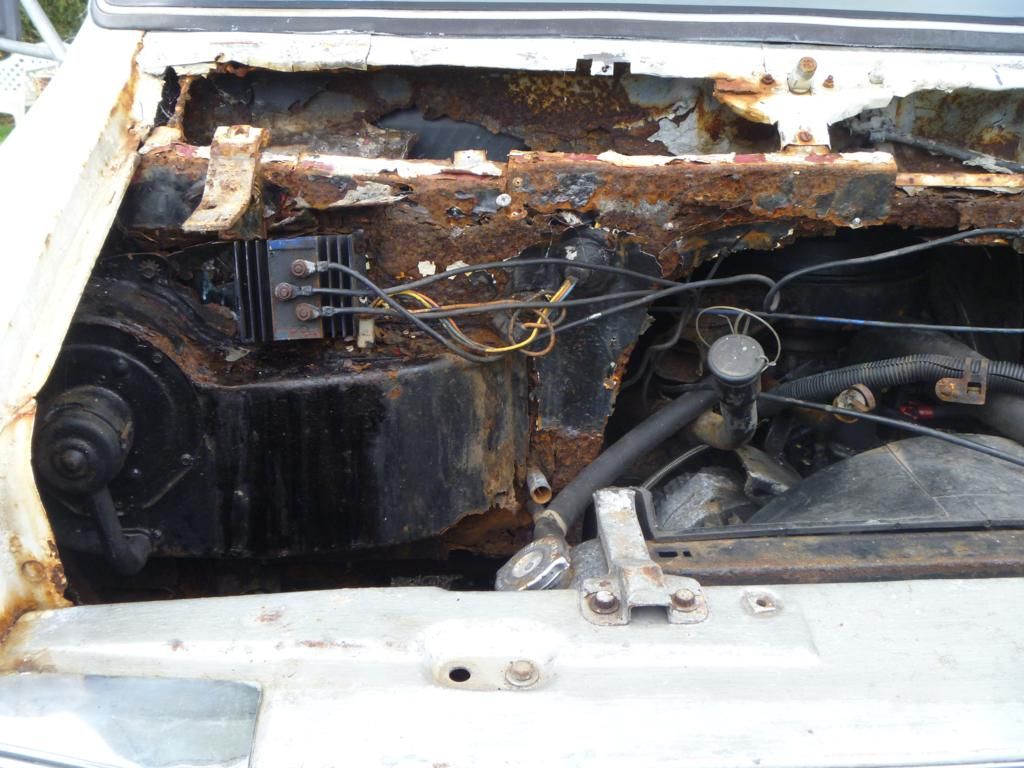
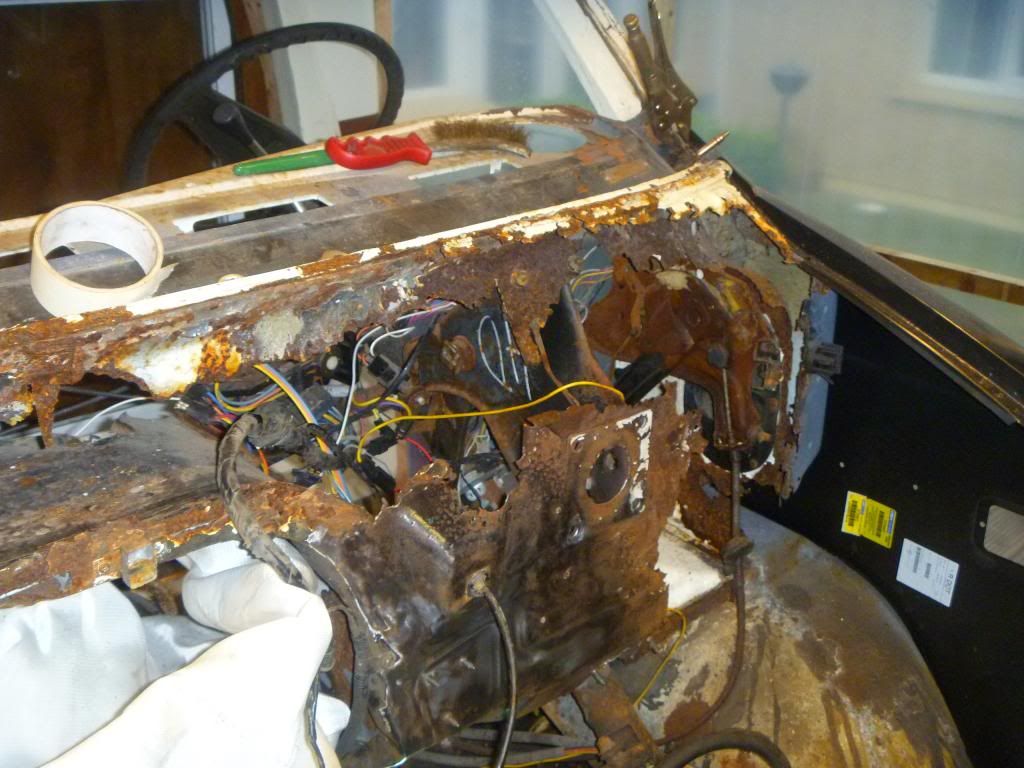
The firewall and wiper well being the biggest problem -
Both doors were shot too.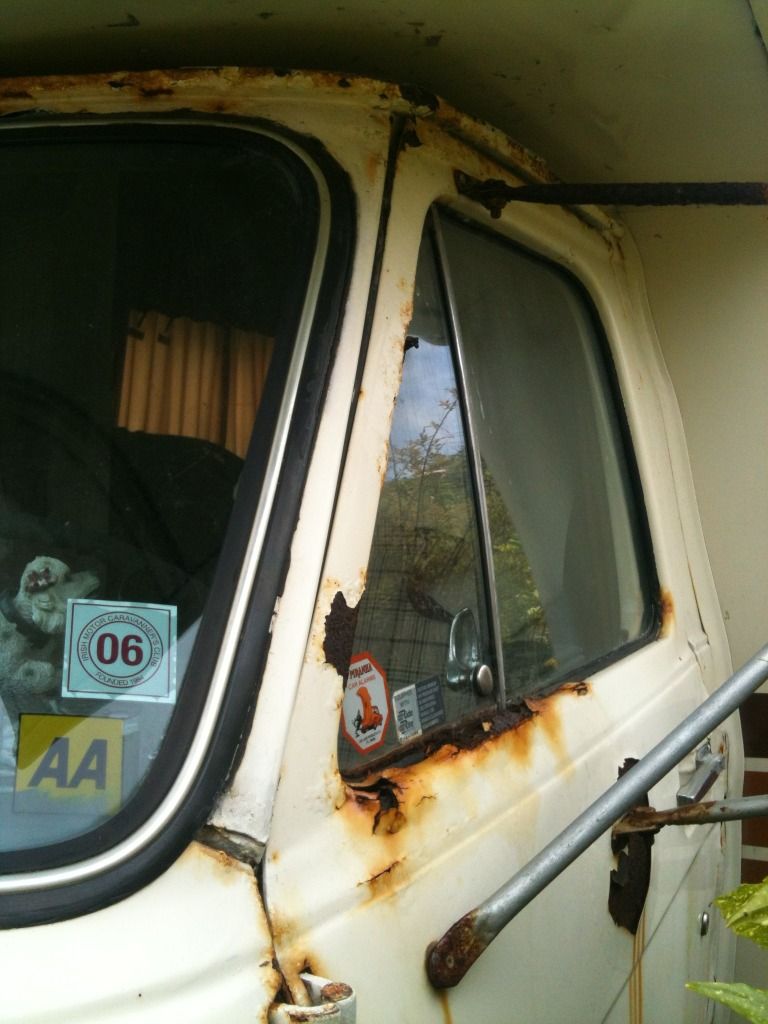
Knowing this, we continued.
We started off by getting the engine running which took several weekends of cursing & swearing, but it eventually fired up - It hadn't run in several years prior to this so I was really happy it came to life and fired on all 8. :)
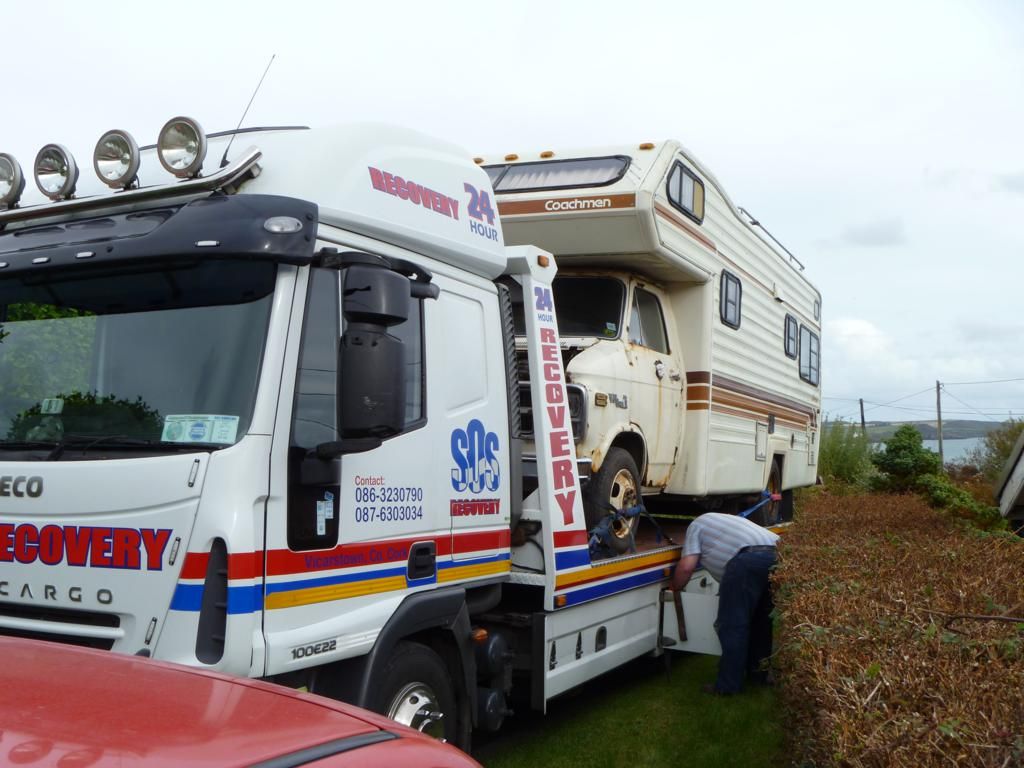
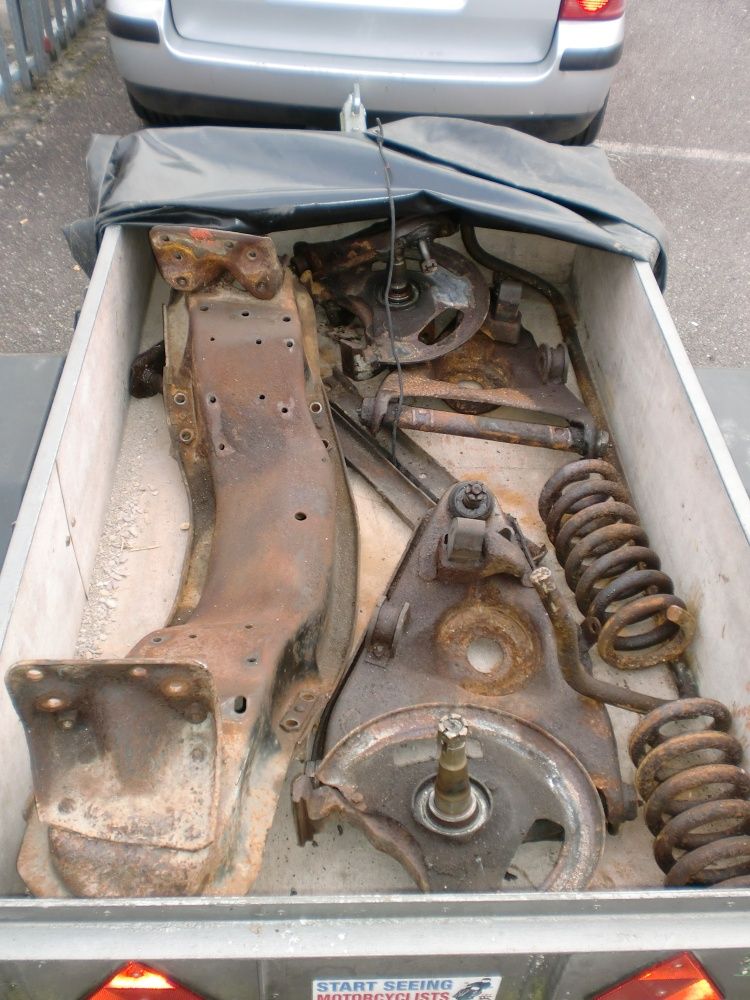
We had to move the camper to my workshop where the real teardown could begin. Even though it was now running and driving (just about) I had some concerns about the drivetrain and brakes, and figured it wasn't safe enough to drive the 40 miles to my home, so we decided to get a breakdown hauler to transport it for us on a flatbed.
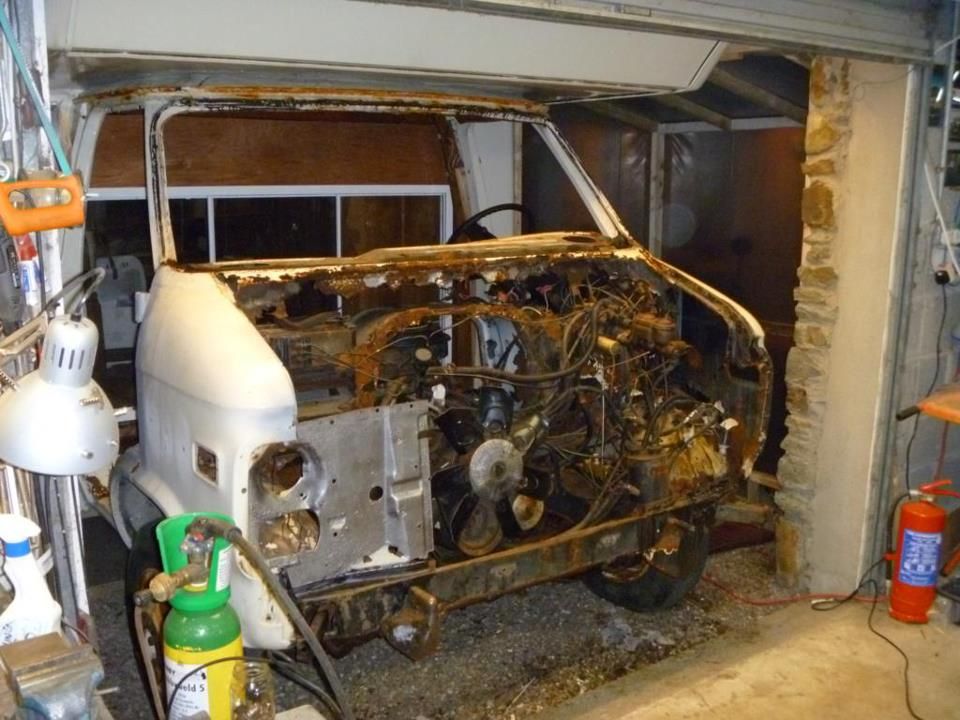
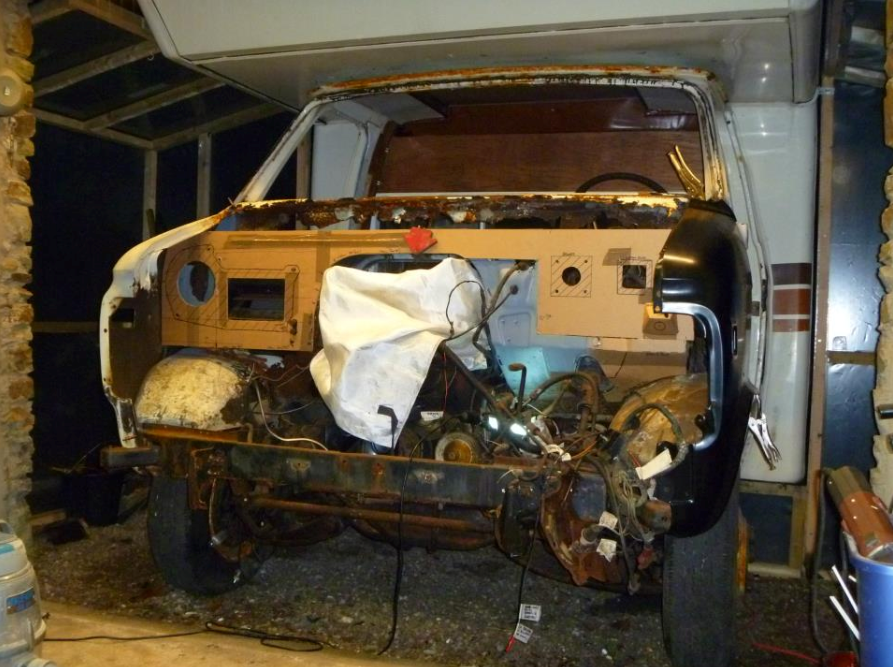
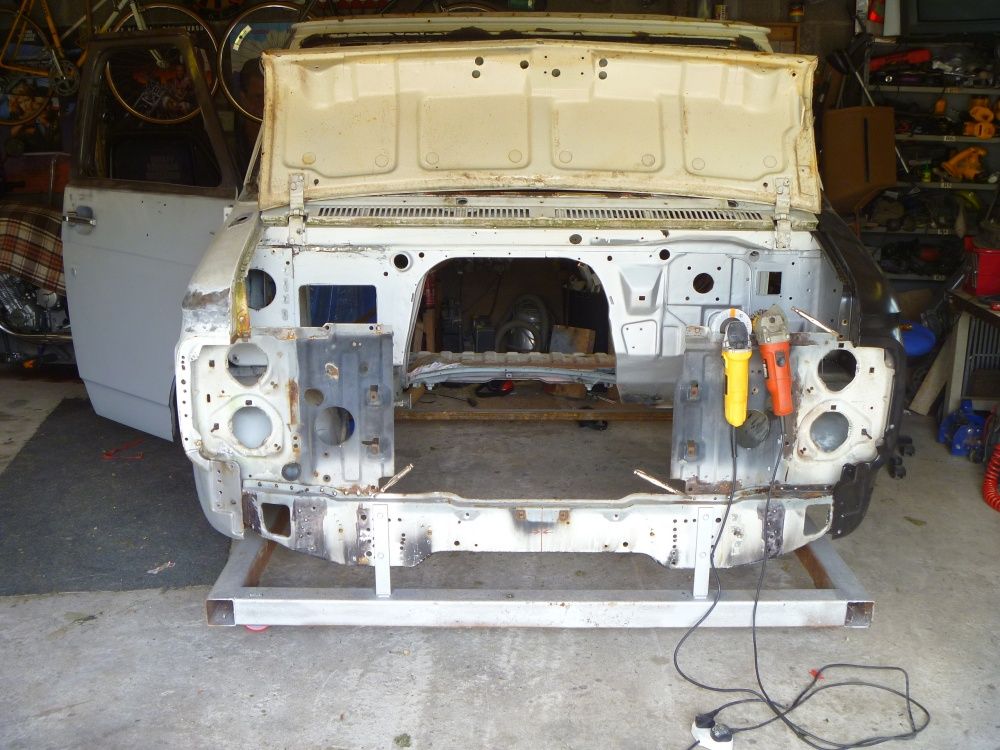
On the 28th Oct 2012 I started stripping down the front end. The lions share of this overhaul is the sheet metal on the cab which has been eaten away by years of exposure in a salty, coastal environment.
Yes there is supposed to be a bulkhead under the windscreen. Mostly rust & cobwebs here... (yikes)
Cardboard bulkhead in progress ... :-)
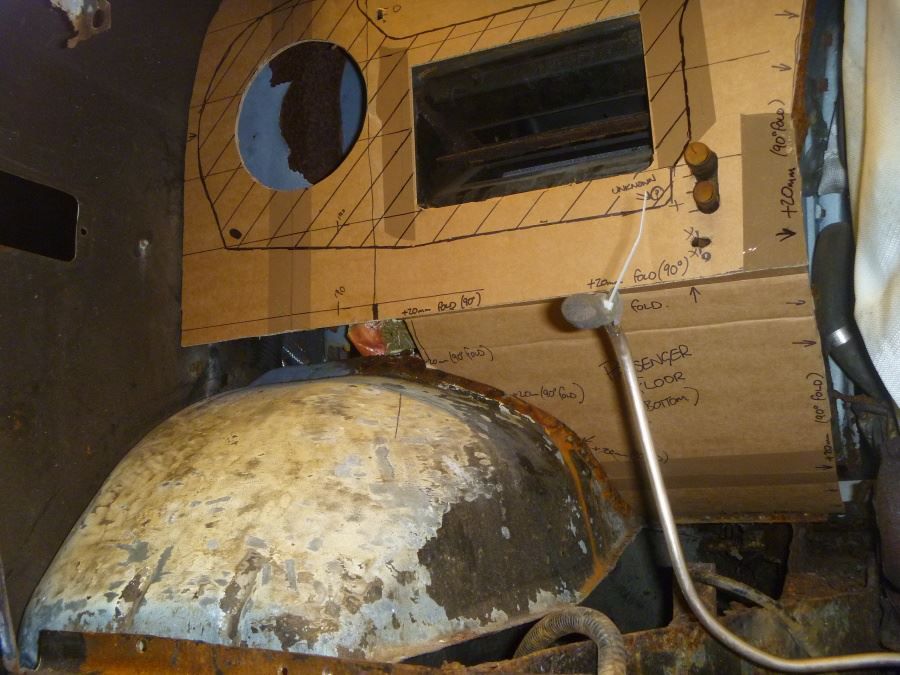
Initially I had hoped to make repairs. Making cardboard templates, then transferring the patterns to steel. I intended to fabricate a bulkhead and other components which had rotted away. After a lot of weekends, beating, cutting and shaping sheet metal, I realised this was going to take YEARS to complete at the rate I was going. Also, I became uncomfortable with the thought of having a Frankenstein cab. Not good. My morale and ambition began to wain. I stopped all fabrication work on the cab around February 2013 and started working on plan B.
Plan B:
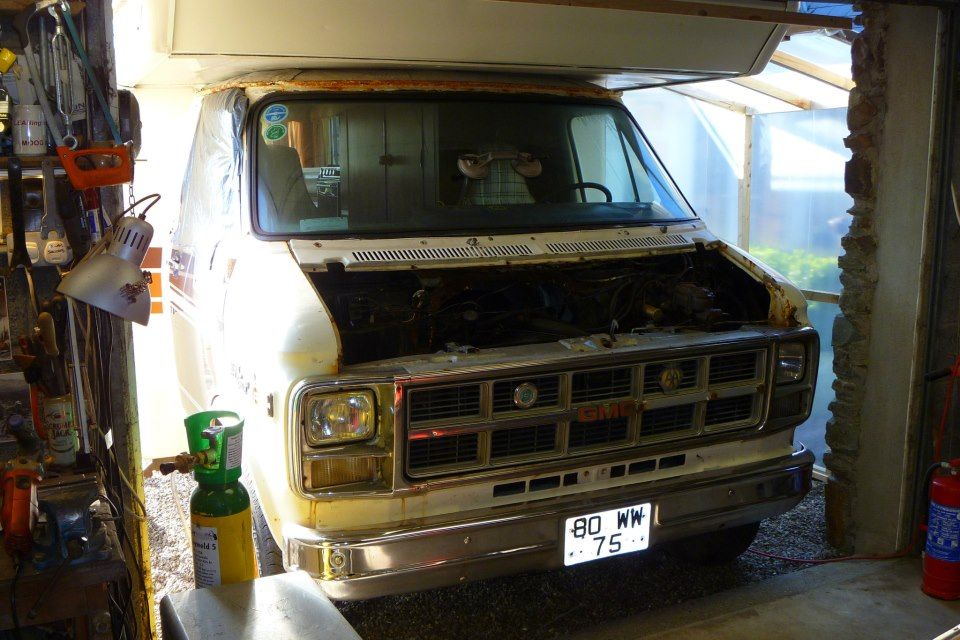
So long story short, I searched for a donor van that I could scrap and harvest the parts I needed. On July 2013 I bought the remains of a 1988 GMC G2500 van from a local van enthusiast. I stripped it down and took the parts I needed..

Chop Chop Chop!
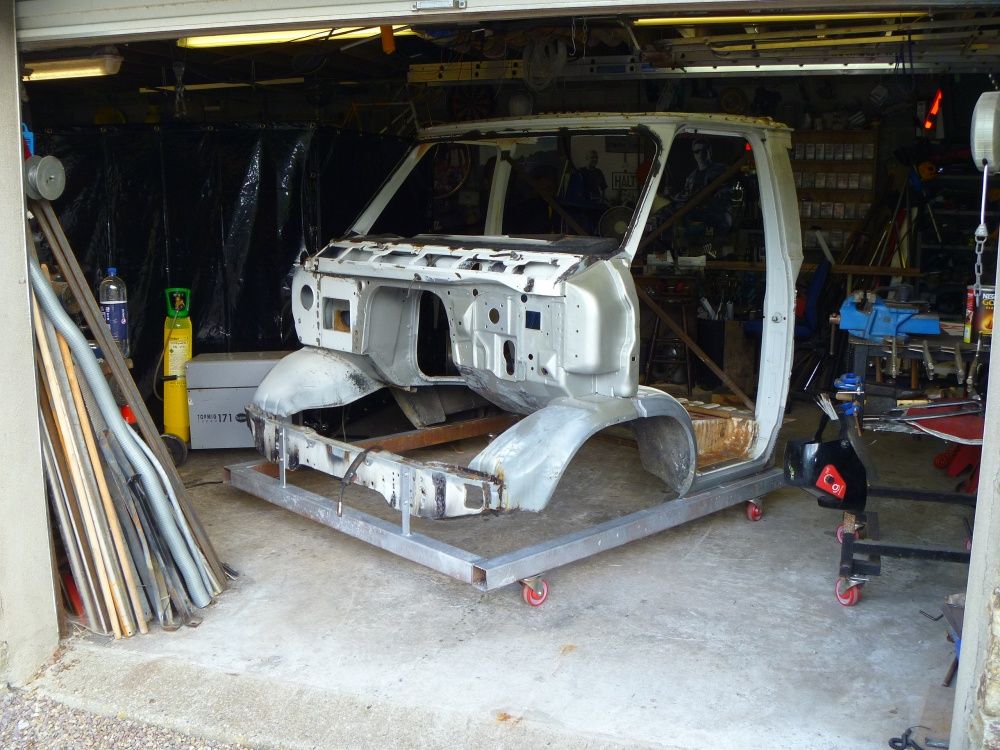
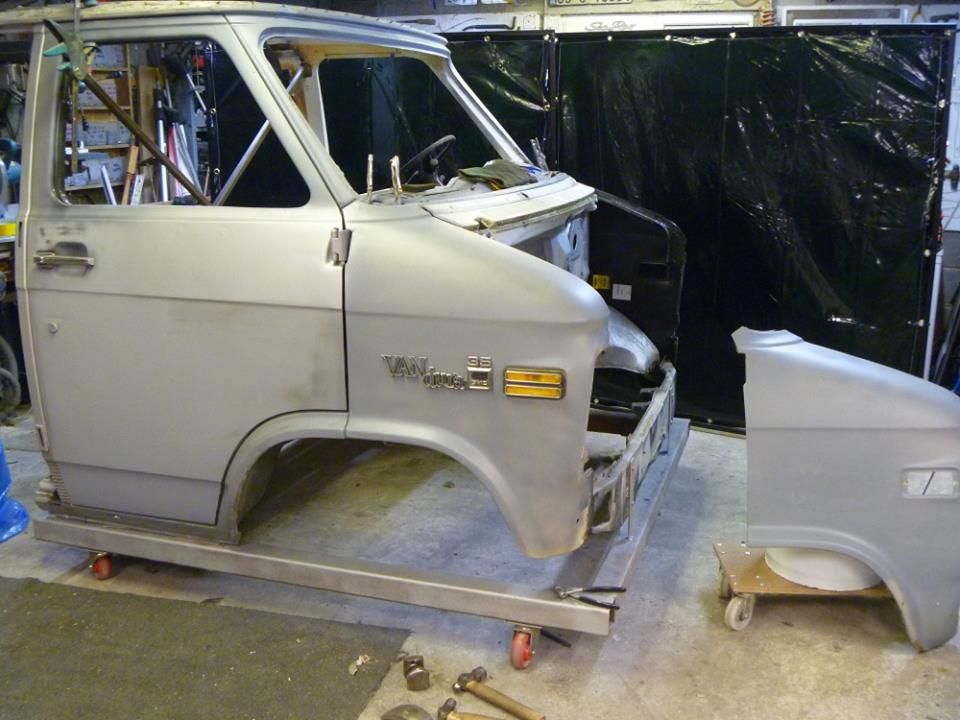
I then rolled it into the shed to make modifications to the donor cab so that it would fit onto our motorhome. I spent the next couple of months just working on the cab section alone. The donor cab is a 1988 G2500 which is NOT the same as our 1980 G35 so some extensive modification was required to make it work.
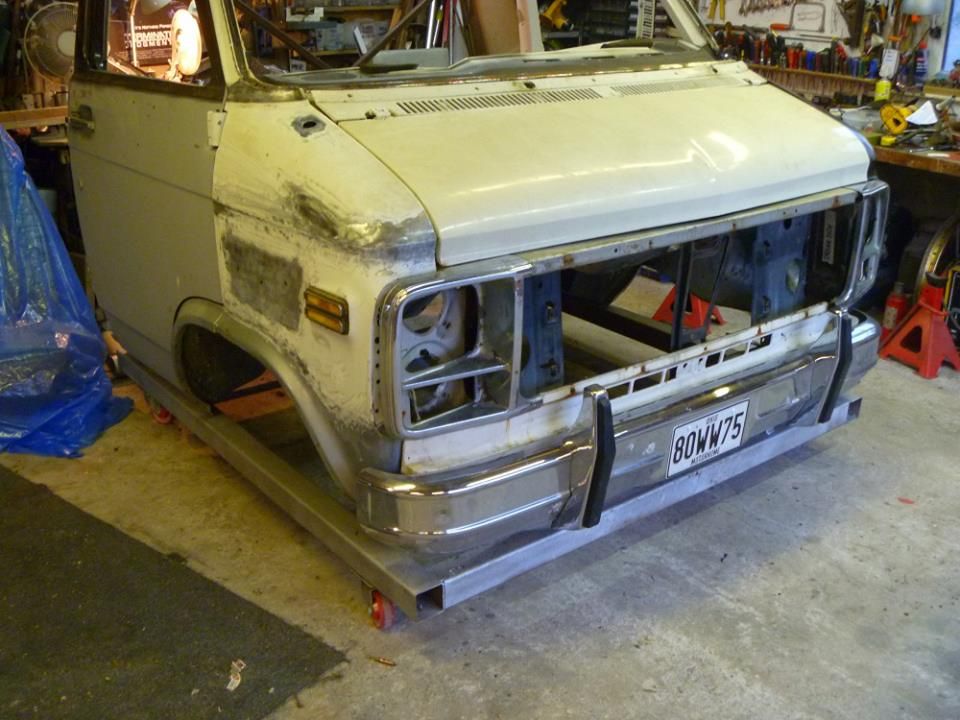 I had to do some work on rusty patches around the windshield frame. I was going to just de-rustify them and fill over with bondo, but I decided to do it right and cut out the rot and weld in new clean metal. Easier to do it now, than later when I have the cab fitted to the camper.
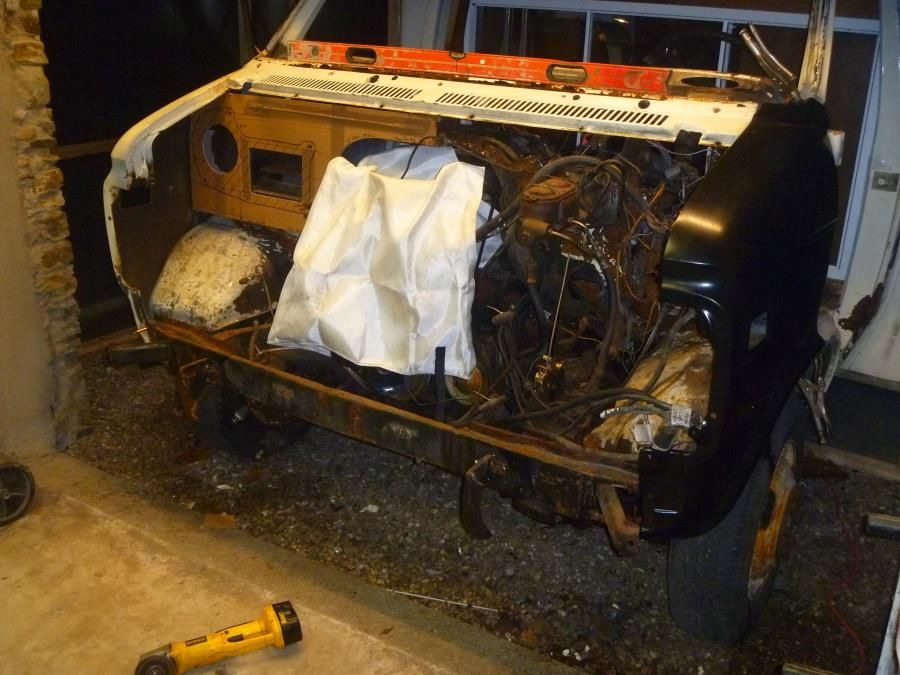
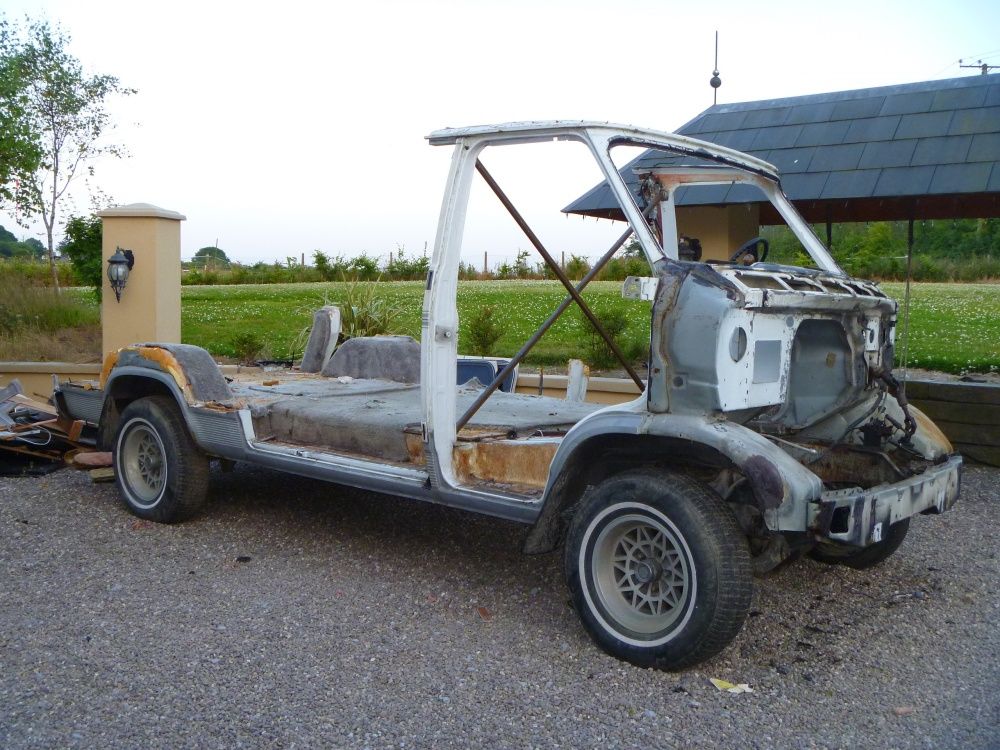
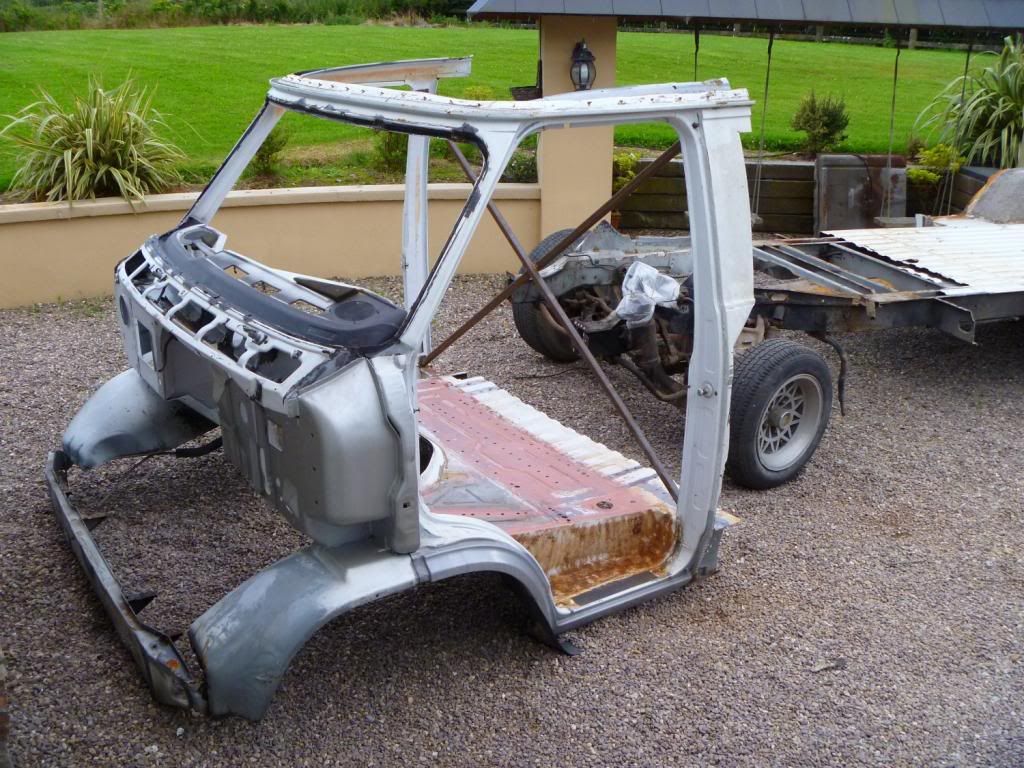
I pulled the engine and transmission out of the camper on the last week of October 2013 - 6.7 litre (400ci) V8, TH400 trans.
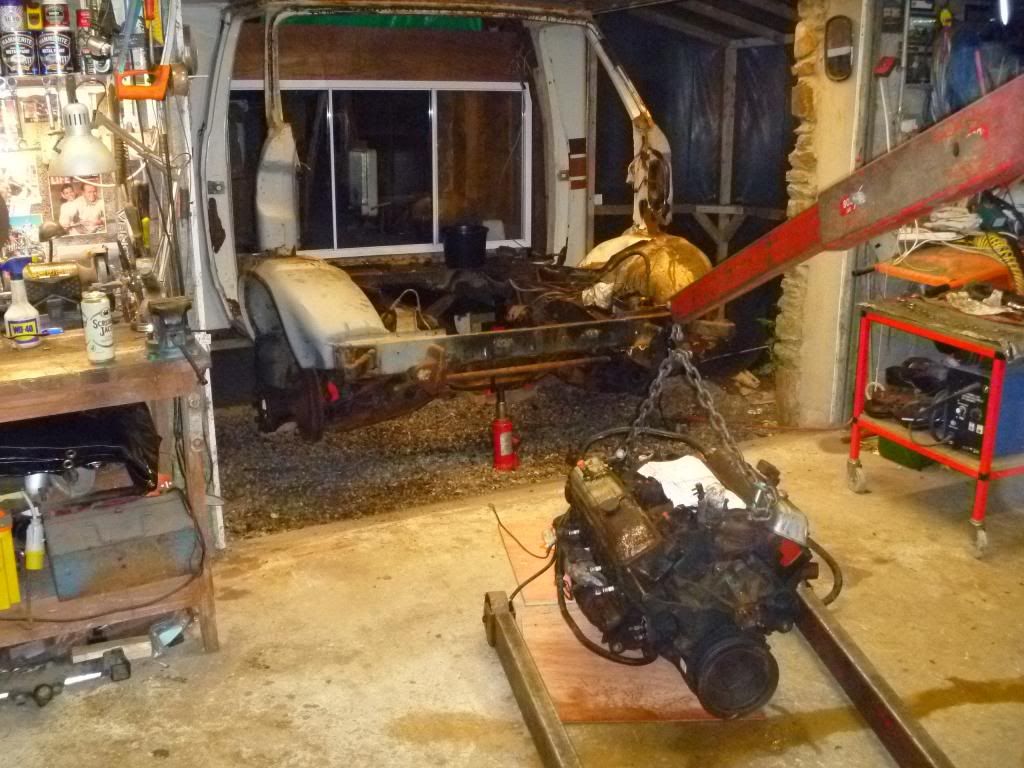
And started cutting away at what was left of the cab.
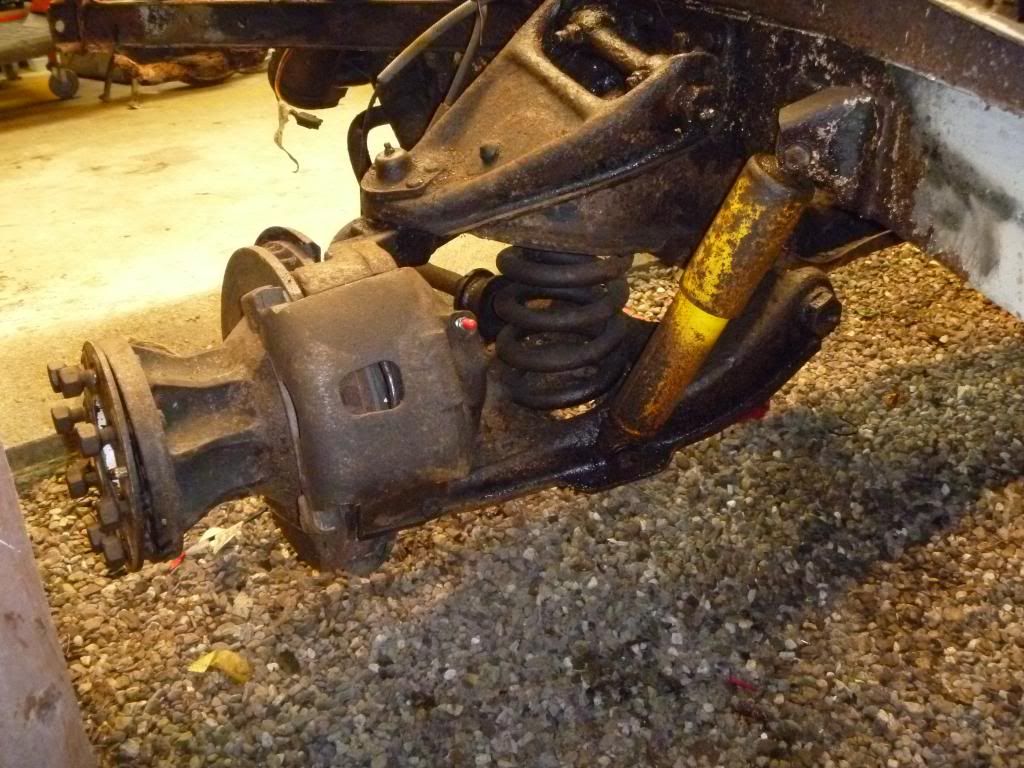
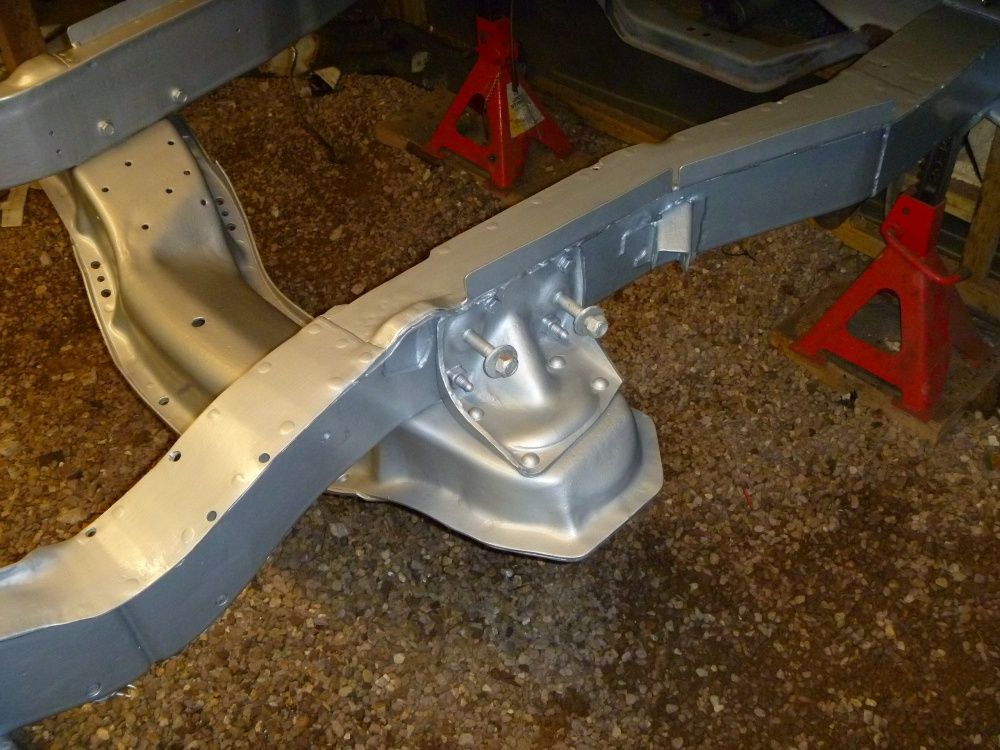
It's been slow progress... I've had some pretty serious corrosion issues on my front cross member so I had to deal with that. Unfortunately this involved stripping the front suspension right down to it's component parts (which was no harm, but wasn't on the master plan). I was able to use the cross member from my donor van, so it was a matter of doing a parts-swop from one to another. The original member was too badly rusted through to consider re-using. That diversion added a few weeks to the project. I also discovered some pretty serious pitting on the kerb-side lower control arm, so for safety sake, I decided to buy a new one from rockauto.
So for the past few weeks I've only been able to refurb the front suspension components and finish painting the chassis. I got the components sandblasted locally. I also did some work on the top capping on the chassis rails. They were a bit thin in places so I replaced them while I was able to get at them.
I finished all that off with 3 coats of rustbullet 'automotive' (silver) and 2 coats of rustbullet 'blackshell'. So with any luck, I won't have any more rust issues under there! I still might give it all a coat of some sort of rubberised bed-liner or some sort of heavy stone chip, just to protect it... still need to make my mind up on that.
Last weekend I got around to fitting the donor cab to the front of the camper so that's a pretty significant milestone for me... :cool:
A few photos -
Bad corrosion on the back of the cross member.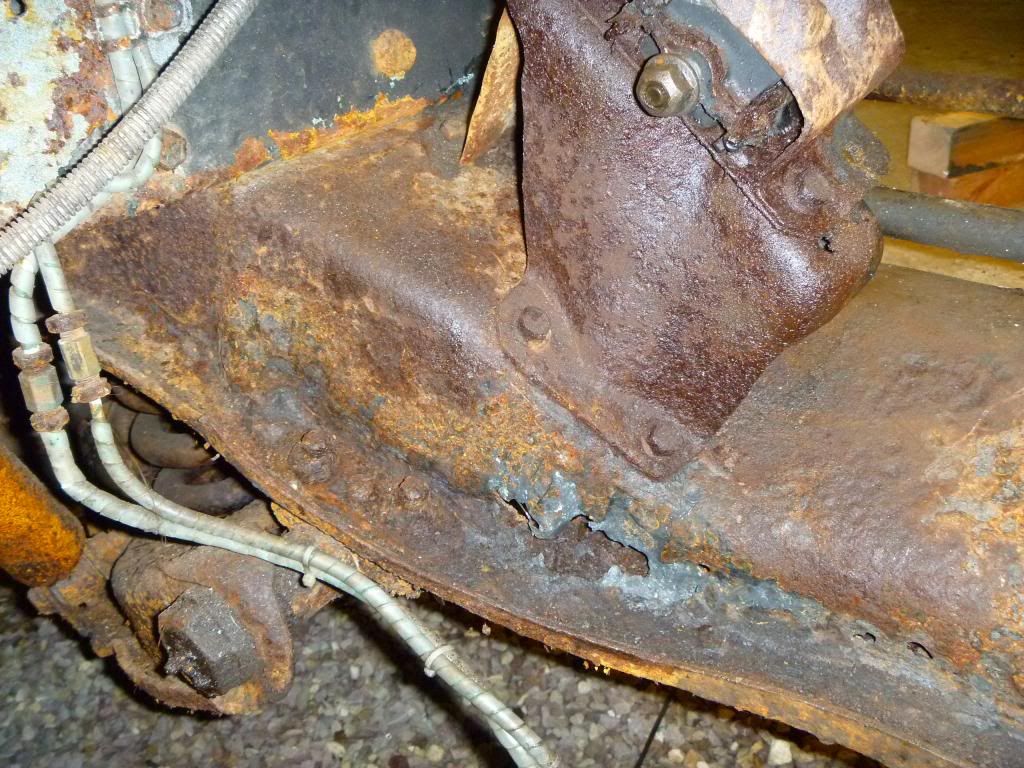
Out with the old (bottom), in with the new'ish [ (top) -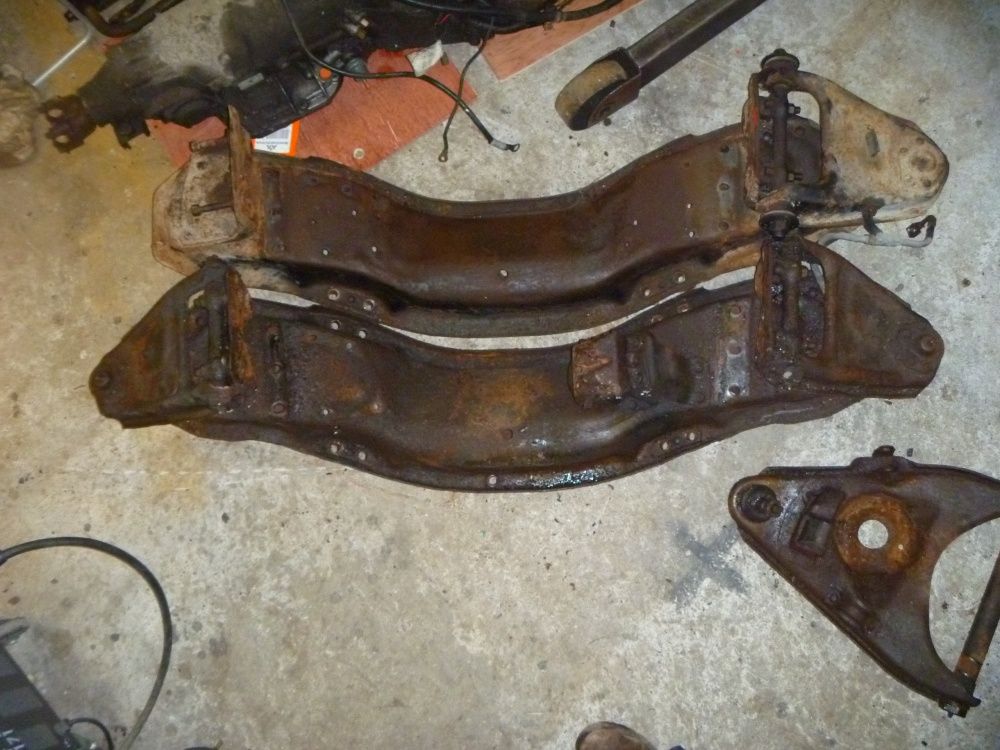 I got all of the parts sandblasted then painted them with Rustbullet paint.
I had repainted this control arm, but decided not to use it in the end. The pitting was a bit too bad for my liking.
I made up a make-shift engine stand for the V8 from a few bits of scrap 40mm & 20mm box. It'll make the engine clean up a little easier.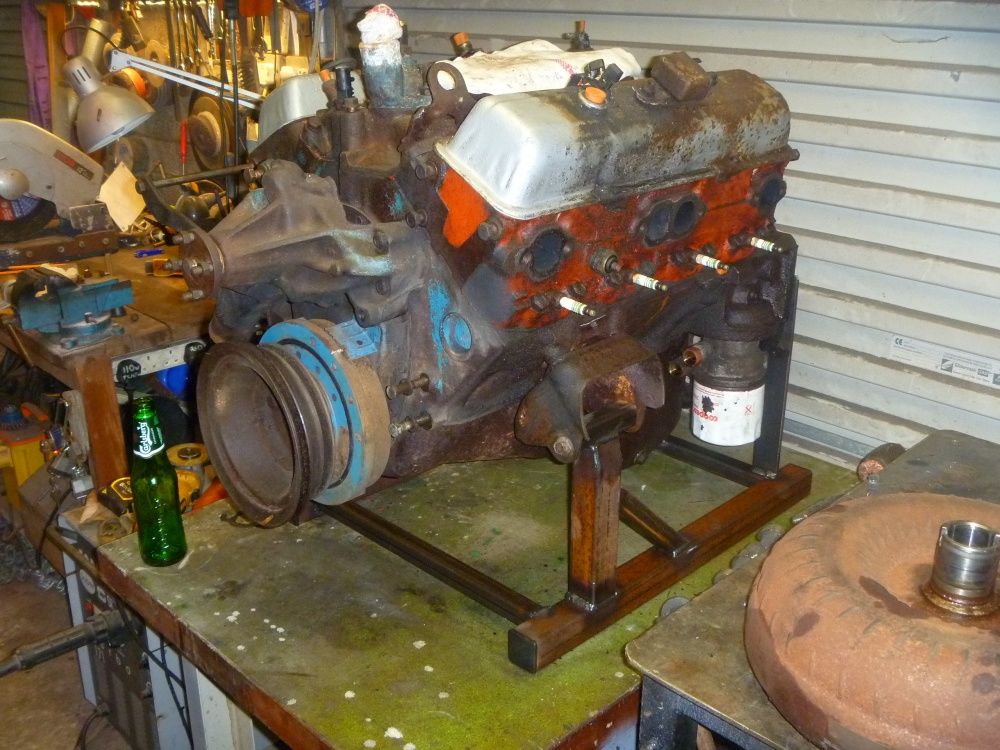
Replaced the top capping on both chassis rails -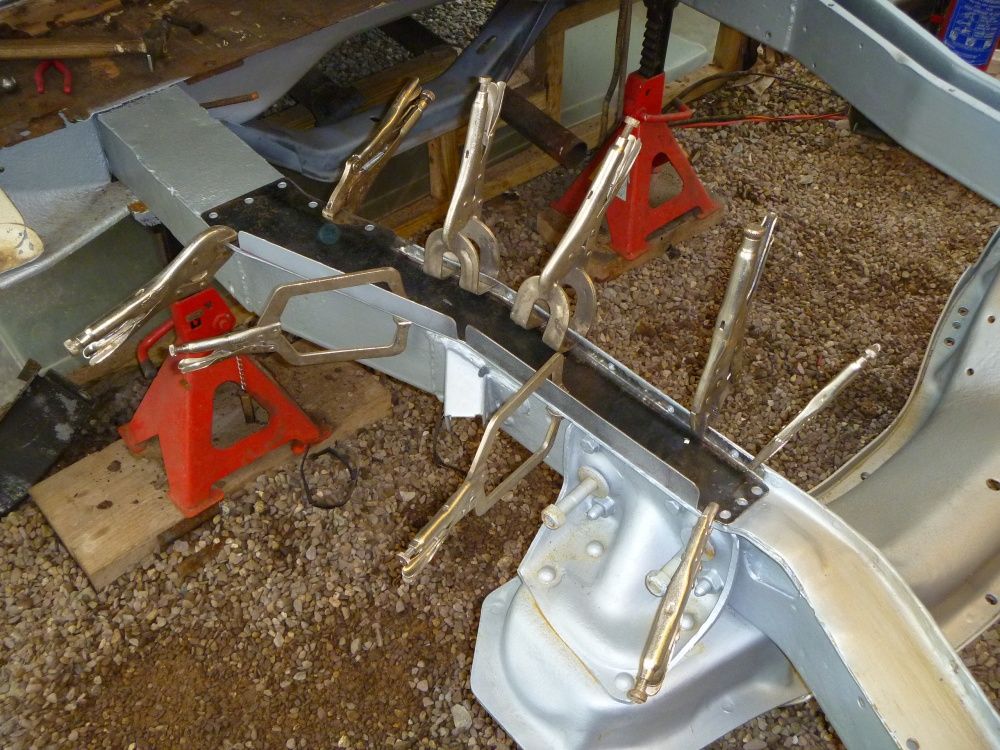
Fitted the cab :-)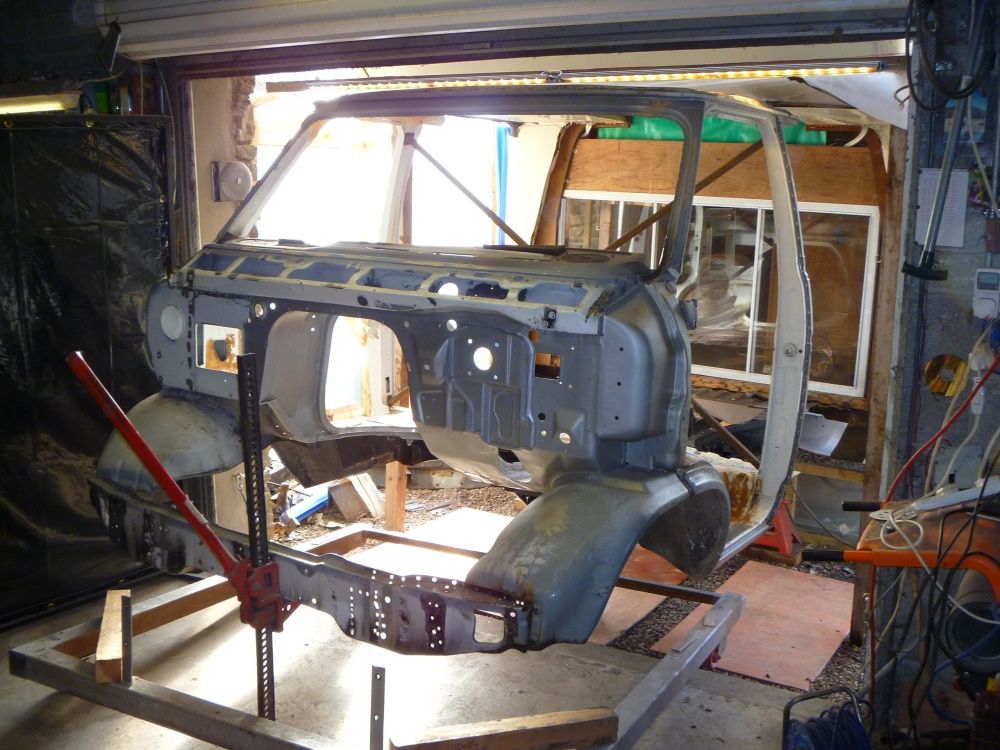
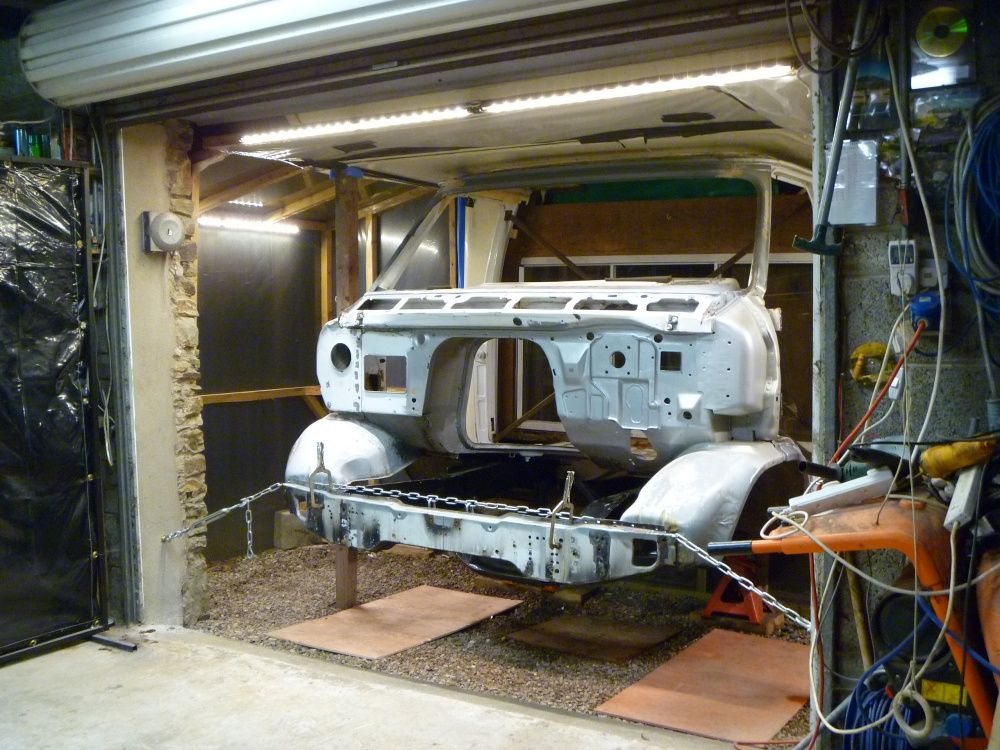
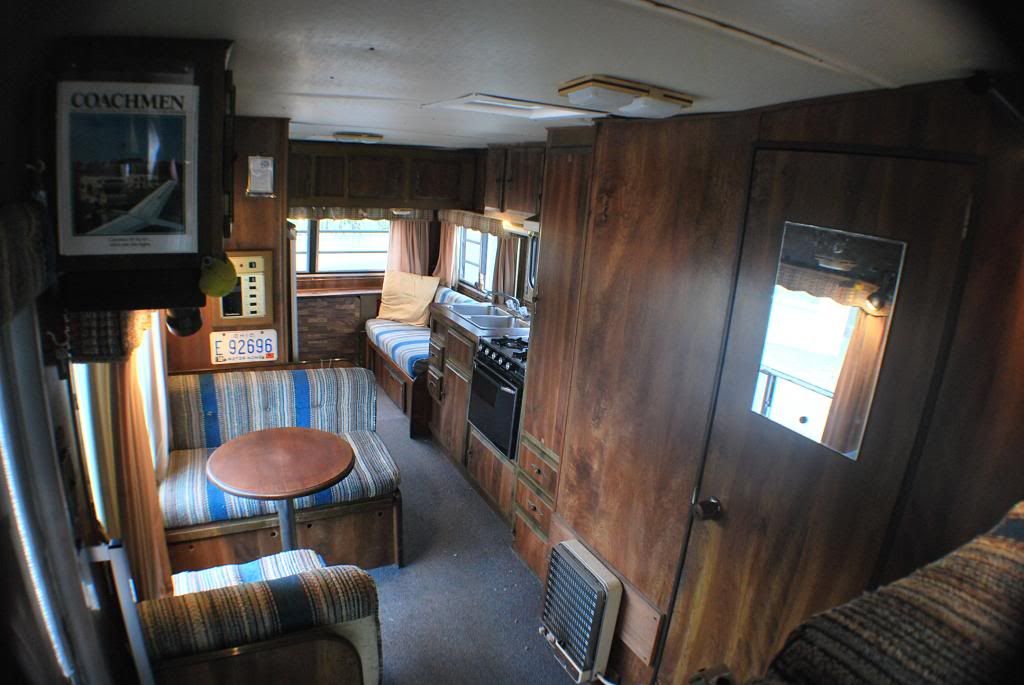
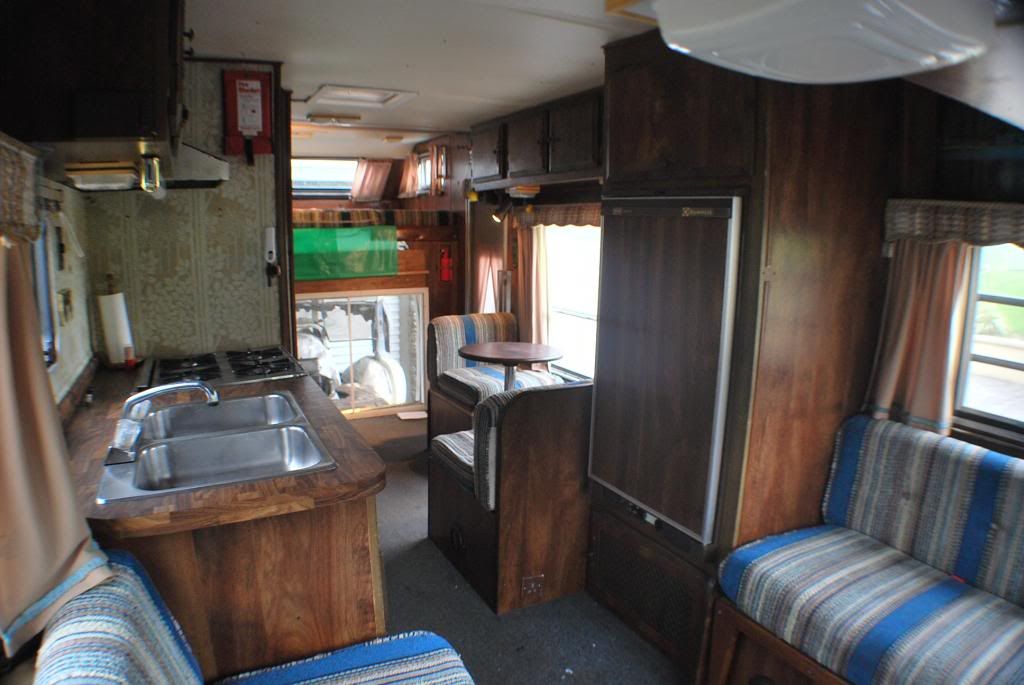
Once I have the cab refurb complete we'll be switching focus to the habitation unit -
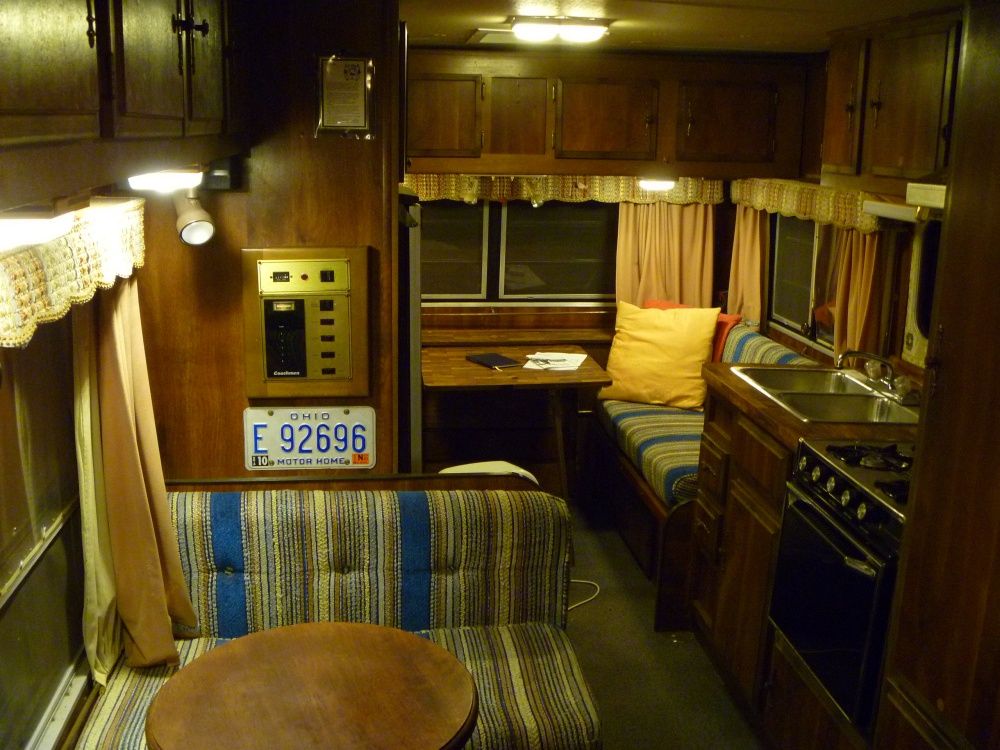
Its in relatively good order considering it's age. It's just a little tired. Everything works and we've scrubbed the heck out of it, so its good enough to sleep & live-in right now. It just needs to be brought into the 21st century. There are no significant signs of leaks or rot in the ceilings, walls or floors apart from one small area in the ceiling in the overcab which needs to be sorted. We'll be giving it a sympathetic modernisation, nothing too mad. Replacing fabrics & floor coverings and upgrading the electrics. The shag pile carpets have seen their day so laminate wood flooring is probably on the list.
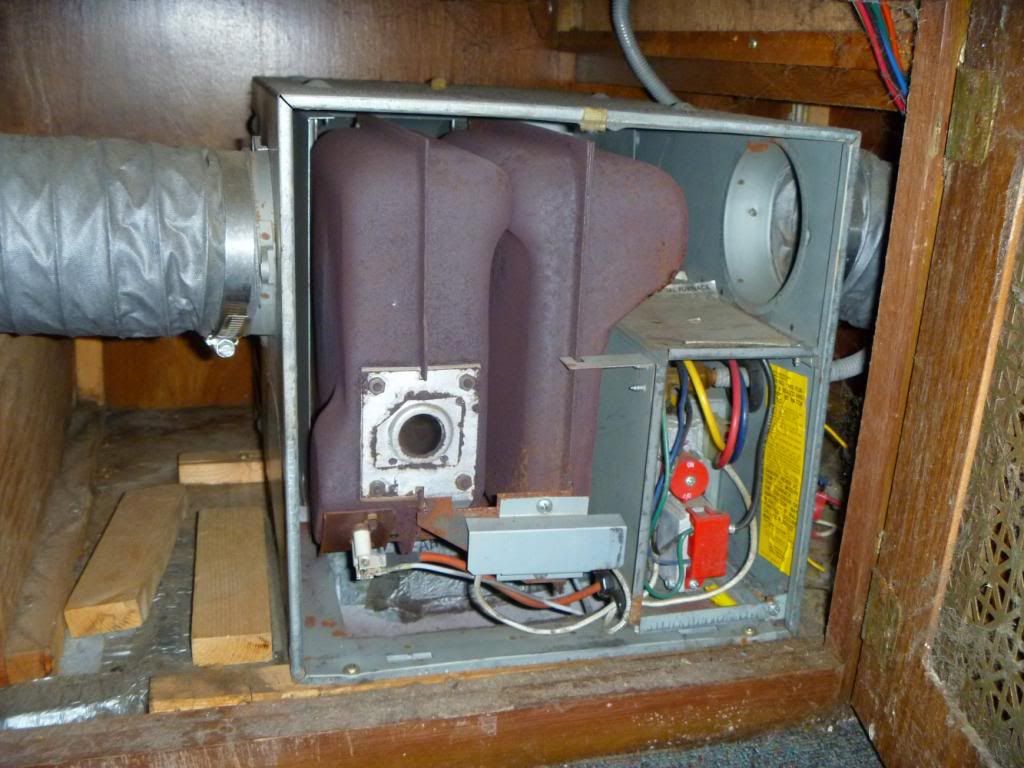
 I had a play with the coleman furnace which promptly fired up after finding an electrical fault in the wall thermostat. :-)
So.... that's where we are right now in February 2014.
I'm doing all of this work in my spare time.
Unfortunately, I only have time on the weekends as what I do for a living involves long days at the office followed by long commute to & from work. So wrenching on the camper is my weekend therapy.
You'll notice that progress is generally pretty slow.
I have a rebuild thread going over on Motorhomecraic if you want to read the full story... http://www.motorhomecraic.com/forum/topic.php?t=2063&page=1
More updates to follow.
Views: 6195
Comment
-
Comment by marcel lemieux on April 17, 2015 at 2:19am
-
Wow totally impress your with workmanship on this project,i almost have the same model and make and its more than fairly in great shape ,but your story and work about is amazing...i,m stunned..thank you for sharing...
-
Comment by leluce on January 26, 2015 at 10:28am
-
Hi Kevin
All I can say is WOW. You have got some serious skills. I like to think I have metal skill, but not like you have. thanks for sharing. Best of luck.
LARRY
-
Comment by Kevin Crowley on July 23, 2014 at 4:24am
-
Thank you Derek for offering to help with parts from TX, and to everyone else, thanks for your nice comments! Its a labour of love and I really am enjoying "the journey" so it's all good! Hearing nice comments makes it even better :-)
Well I guess another update is due!
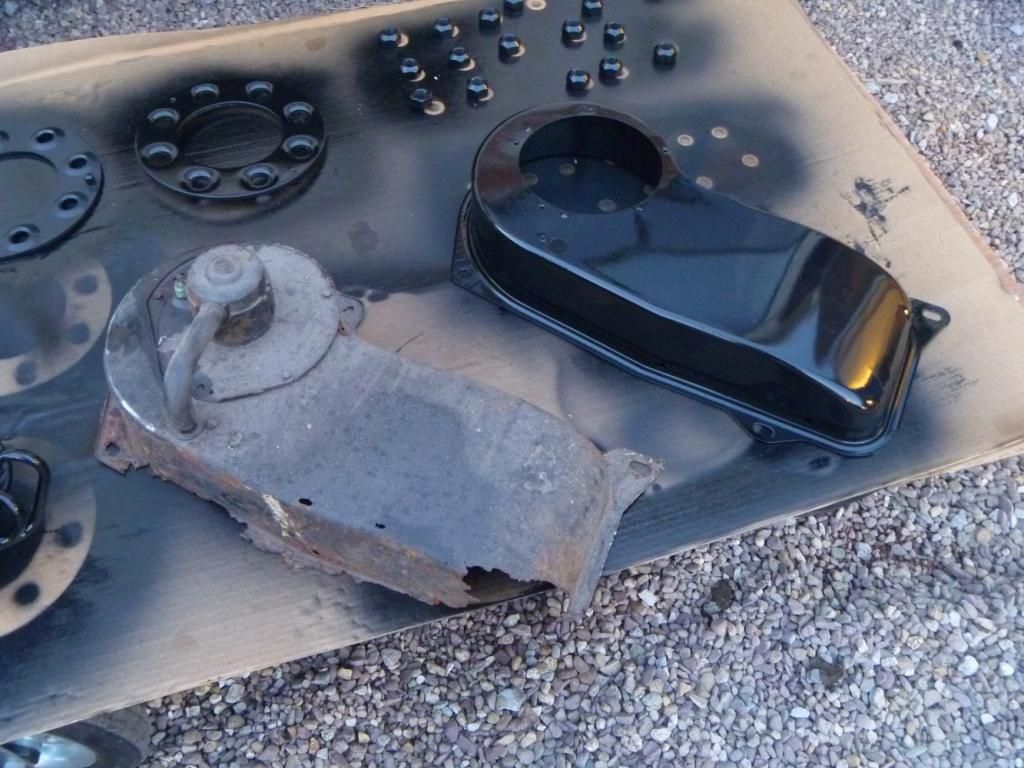
Not a whole lot to report but I am still working away and getting closer to the end-zone every day. I found another box of rusty parts in the corner of my shed that I previously missed (as you do) so I got to stripping and painting them. While I was at it I prepped and painted the blower housing. It was my first attempt using a HVLP spray gun and I was pleased with the result! Here, I've put the old and new blower housing side by side for comparison... :-)
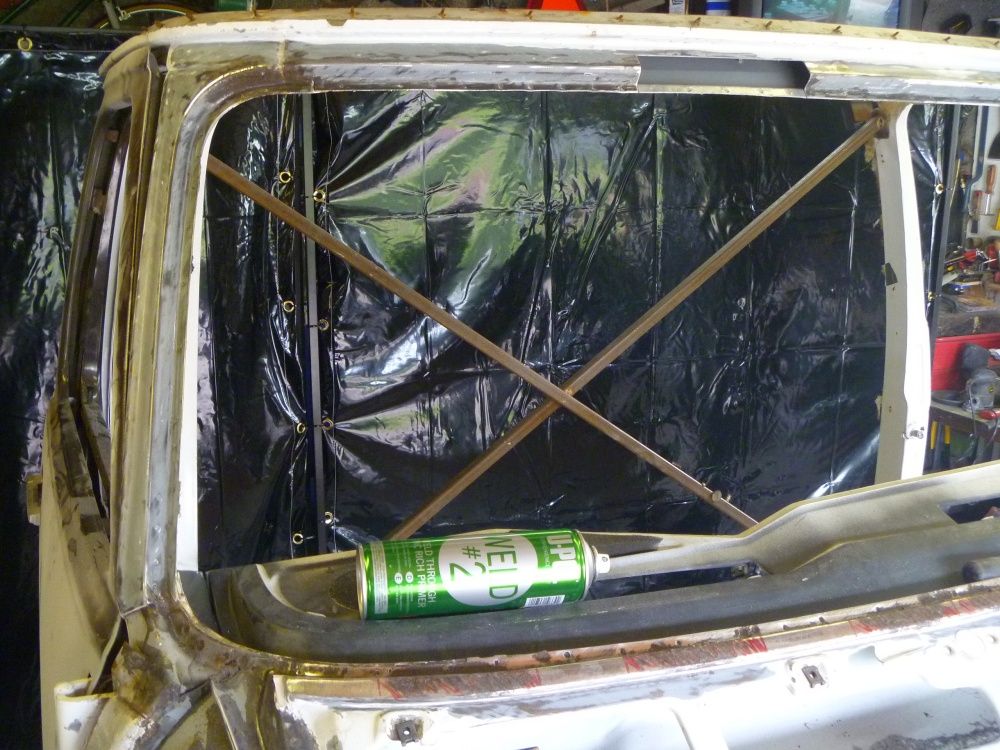
I had to do another bit of bodywork to the cab, and seeing as it wasn't welded to the chassis yet, I was able to remove the cab and get at areas that would be difficult to reach while it was attached to the coach. I decided to replace the roof skin over the windscreen and I had to made two filler panels behind the B pillars. These were a pain as the doors had 4 body lines that had to be continued across the panels. I achieved this with fairly basic tools. Some steel forms that I shaped out of scrap metal, a 4" masonry chisel, some hammers and a few cans of beer and rock & roll music ;-).
I had some problems getting my hands on light sheet metal to make the repair panels, so I went to my local junkyard and got the guys to cut the roof off an old car.
 It yielded some nice workable 0.9mm sheetmetal.
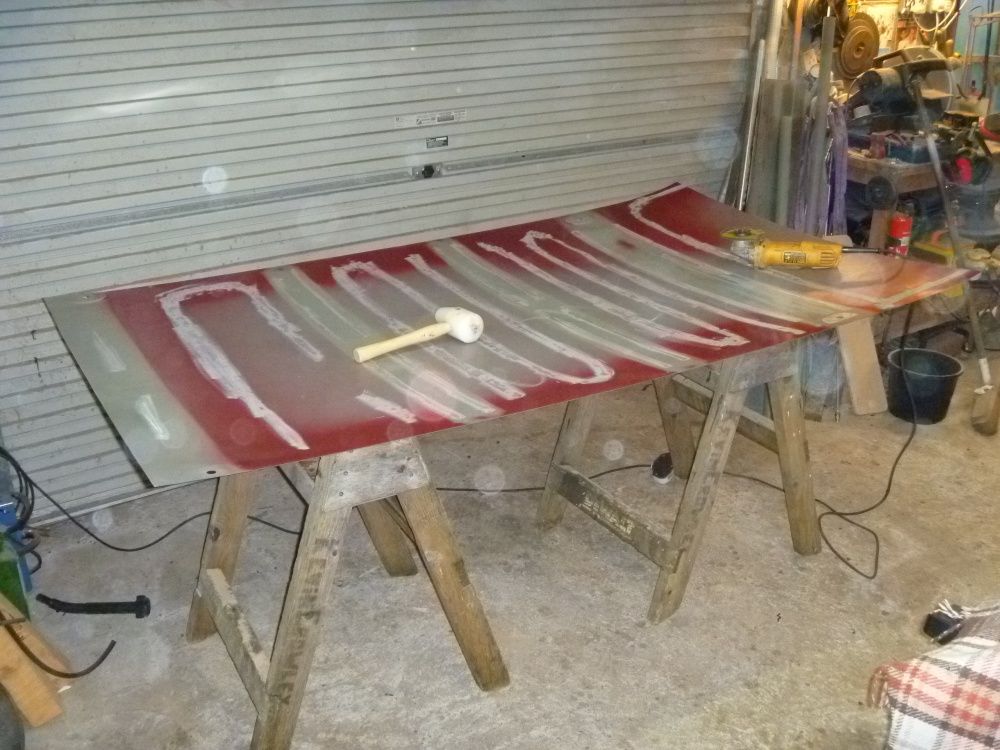
I then cut that sheet into the shapes I needed.

The end result was pretty good (if I don't say so myself) lol
Still needs to be welded in this photo...

I don't have any more recent photos to share, but you get the jist... The cab is now back on the chassis and I am just about ready to weld it into place.
-
-
Hi Oliver. I didn't realise you were in Ireland. I'm down in Fermoy, Co Cork. Of course, if you're ever down this way, do call by! Have you found your way to Morothomecraic yet? An Irish motorhome forum. There's a few more 'American RV' owners over there too. We'd be glad to have you and your '76 winnie in the group!
-
Comment by Oliver Reilly on June 25, 2014 at 6:30am
-
Hi, im doing up my 1976 winniebago itasa i love it. i tuck her out for a run at the weekend. and notice a little ply in the stiring ? not to much do.keep up the good work photos are awsome. were are you in ireland ? im in co.louth. word love to come and see her.
-
-
Hi Greg,
I certainly wish that I could pick up a replacement engine and trans for the kind of money you did, but unfortunately, 350's and 400's are less common over here, so they command much higher prices on this side of the pond. I had considered upgrading to FI, but I really want to keep the old school mechanics. Yes, I know I will probably pay for it at the fuel pumps! Call me old fashioned, but I prefer to have minimal electronics and know I should be able to fix my engine on the side of the road if anything goes amiss.
I know a guy that is selling a barely used LS1 engine but he's looking for $4k for it which is miles away from my budget!
You're absolutely right about the iron oxide holding the paint together, yes it was that bad! :-)
Yes, I made sure to hold onto the VIN tags! One is stamped into the passenger side of the chassis rail and the other is a riveted plate located next to the dashboard by the driver side A pillar. Unfortunately the other hidden VIN on the bulkhead behind the blower box assembly was nothing but rust n cobewebs on the original firewall, so it's gone, but to be honest, I don't think the MOT guys will be disassembling my cab to find every matching VIN... I'm sure the two obvious VIN's will be all they need. I have a full letters/number punch set that I could stamp a new VIN there, but I don't think it's necessary considering it's inside in the blower housing that is bolted to the firewall. Thanks for thinking of the VIN's, some folks don't realise until it's too late!!
-
Comment by Gregg Eshelman on June 25, 2014 at 1:18am
-
Did you save the bit with the VIN to weld onto the replacement cab? Here in the States one can have nothing but an original VIN plate from an old car and build an all new one around it. A couple of companies actually do that by building 99.99999% new 1957 Chevy and 1960's Mustang bodies from reproduction parts then tacking on an original VIN. TADA! It's a brand new "original" car, it just had every part replaced...
-
-
That wasn't a van cab, that was iron oxide held together with a bit of paint. ;-) Have you thought about upgrading to throttle body fuel injection or is that allowed in Ireland? I used to get an English version of a European custom car mag called "Chrome and Flames" (Or Chroome und Flammen) and several articles mentioned how in some countries absolutely nothing could be modified from stock until a vehicle was 25 years old.
I bought a 1991 350 V8 and 700R4 transmission with TBI for $175 and will be swapping the trans and injection to my $1000 1982 GMC 3500 1-ton truck. Wouldn't matter even if I lived in California because it's a 1-ton. Such trucks weren't EPA regulated until sometime in the mid 90's. In CA a lighter duty truck or any passenger vehicle has to be made in 1975 or earlier before the State will allow you to make it *less polluting*. Looking forward to better MPG!
-
-
Thanks for your nice comments folks. I sure wish I had more progress to show you but you know how it is...
With regards to the engine, I'm in two minds right now about the colour. I always thought I'd prefer to go with understated black and add a couple of chrome accents here and there to make it pop a little, but after going to a custom american car show in my local town recently, I was kinda smitten by the cars whose engines were painted with the "correct" Chevy orange!
I picked up a couple of rattle cans or the correct colour paint, but I still need to make my mind up which colour... black or orange... Hmmmmmmm
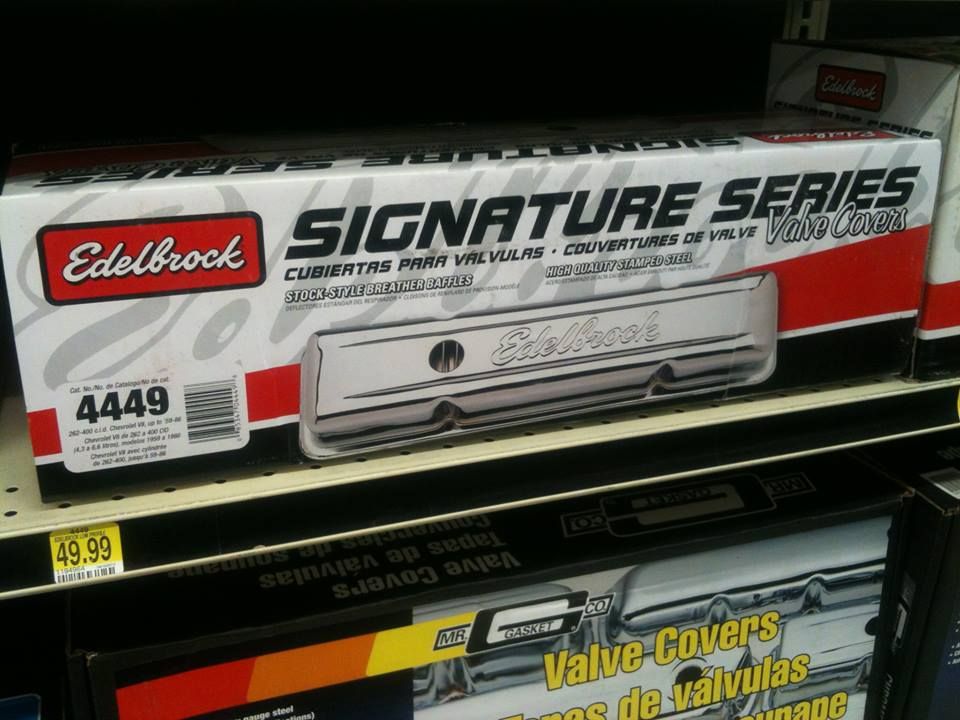
I also bought a couple of edelbrock chrome rocker covers and other little bits and pieces to add some bling, but truth be told, when this camper is back on the road, you will hardly see the engine when you lift the hood, but at least I'll know it's pretty... lol
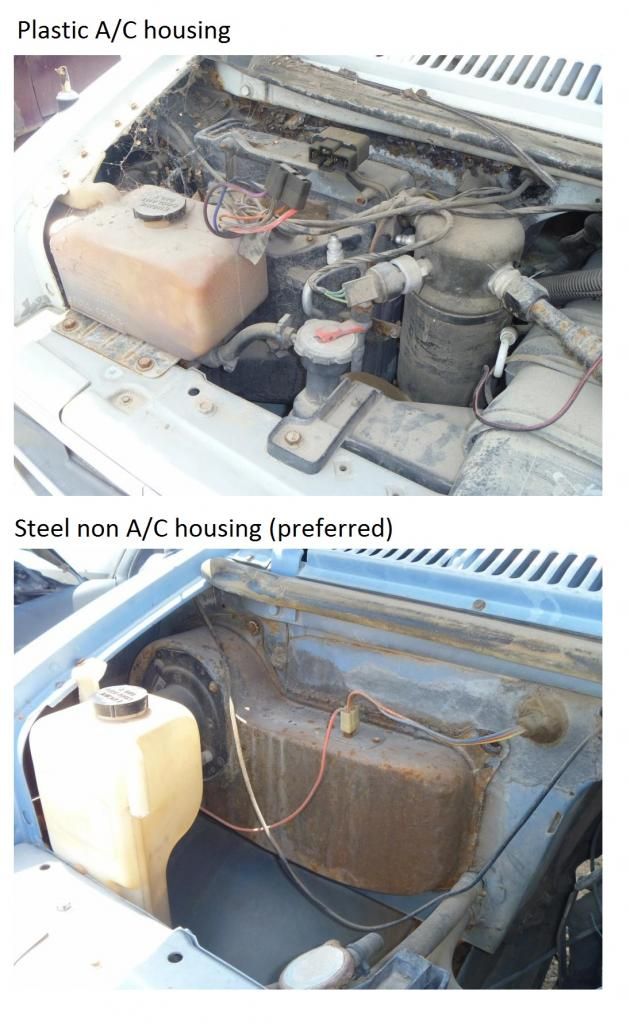
Here's a better illustration to show why I wanted to go with the non AC option. Besides the fact we live in Ireland and don't need AC... I prefer the tidy non AC unit. It leaves some room perhaps to add another battery, or simply to keep the engine bay uncluttered.
-
Comment by Stephen Moss on June 24, 2014 at 12:21pm
-
All I can say is "Damn, your good!"
HOW TO MEMBER POSTS
JOIN US AT GOOD OLD RVS
If you love classic and vintage RVs then come Join us. Come on in and have some fun. JOIN HERE NOW
Forum
Help
Started by Brianna Scroggins in RV Repair & Maintence on Monday.
1973 Scamper Class C electrical question 1 Reply
Started by Ken Vanderburg in RV Repair & Maintence. Last reply by Jimco_W001 Mar 29.
Starcraft Ceiling Repair
Started by Donald Morgenroth in RV Repair & Maintence Mar 18.
Blog Posts
1973 Dodge Hall GTC
Posted by Alfonso Vilches on July 7, 2023 at 8:18pm
Parts for a 1978 Allegro Motorhome
Posted by Ellen (Ellie) Rice on December 9, 2022 at 6:24pm — 1 Comment
Wanted side lights
Posted by David & Misty Preciado on June 10, 2022 at 6:18pm — 2 Comments
1991 Beaver Contessa
Posted by John Curtis on March 5, 2022 at 11:00am
Events
Videos
-
Men Don't Cry, They Act
Added by Jimco_W001
-
-
Tin Can Tourist Rally 2021
Added by Daniel Long
JOIN US - COME ON IN!
Members Restoration ALBUMS & Stuff We Like
-CLASS C FULL Frame off Restoration by Kevin Crowley
-Kerry Malseed's 1947 Flxible Clipper Bus Restoration
-Kevin's Wildcat Trailer Frame Up Restoration & Materials Used
-Rod Paints His Trailer Before/After Pics
-Understanding Brake Controllers
Blogs, Posts and Other things We like to Follow....
Vintage Travel Trailers, Vintage Campers, Camper Restoration, Bus Conversions, Vintage RV Forums, Old RVs, Tiny Homes, Boondocking
A work of art by member Paige Bridges
+++++++++++++++++++++++++++++
Disclaimer - Please Read it
Enjoy this site and use it totally at your own risk.
By using or viewing this site YOU agree to Hold Harmless anyone associated with it including other members. Also, YOU agree that YOU are solely responsible for ANY and ALL actions, results or damages. Members "opinions" are just that and any repair or alteration comments or recommendations are by folks who are not licensed repair or mechanical professionals. Any repairs or modifications you do totally at YOUR OWN RISK. Use licensed professionals for all work to avoid possible serious injury or damage. Use banks for purchases. Have fun!
Copywrite & Trade Mark Registered GoodOldRV© ,GoodOldRVs©, GoodOldRVs.com©,GoodOldRVs.net©,GoodOldRV.Com©
© 2024 Created by Jimco_W001.
Powered by
![]()
You need to be a member of Good Old RVs to add comments!
Join Good Old RVs